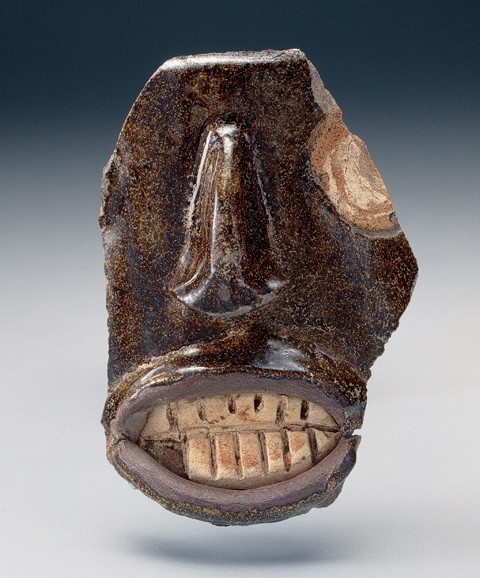
Face jug fragment, Miles Mill, Edgefield, South Carolina, ca. 1867–1872. Alkaline-glazed stoneware. H. 5". (All fragments courtesy Georgia Archaeological Institute; photo, Gavin Ashworth.)
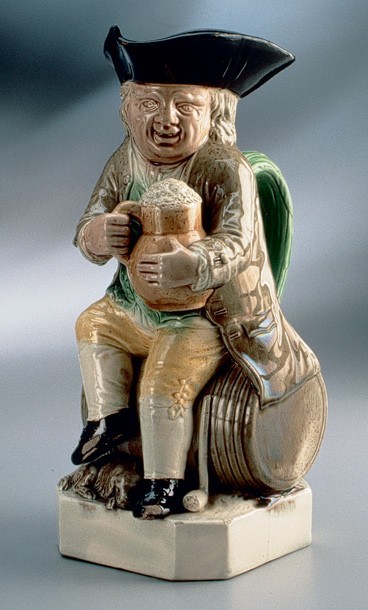
Toby jug, Staffordshire, England, ca. 1785. Pearlware. H. 10". (Chipstone Foundation; photo, Gavin Ashworth.)
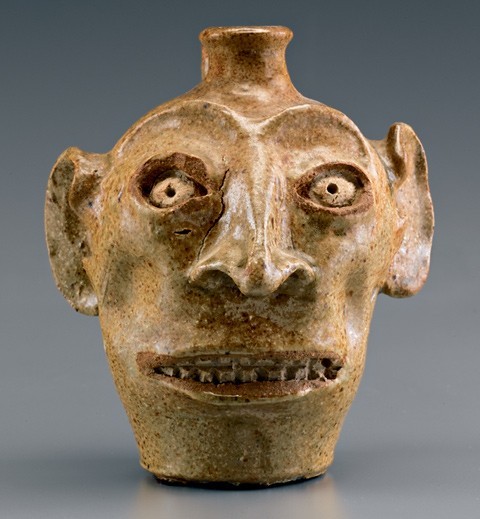
Face jug, Edgefield, South Carolina, ca. 1860–1870. Alkaline-glazed stoneware. H. 5 3/4". (Private collection; photo, Gavin Ashworth.)
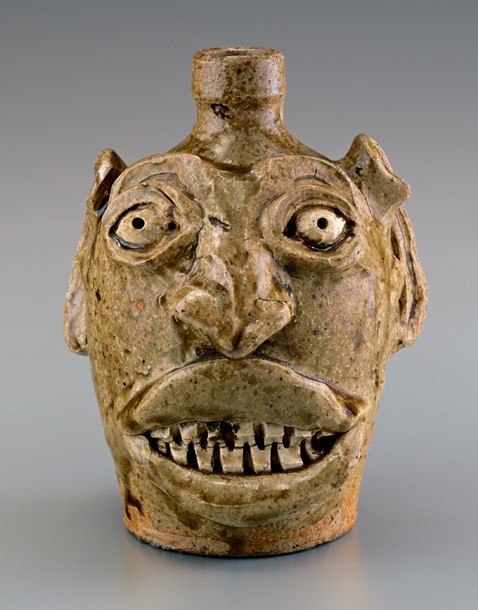
Face jug, Edgefield, South Carolina, ca. 1860–1870. Alkaline-glazed stoneware. H. 6 5/8". (Courtesy, James Witkowski; photo, Gavin Ashworth.)
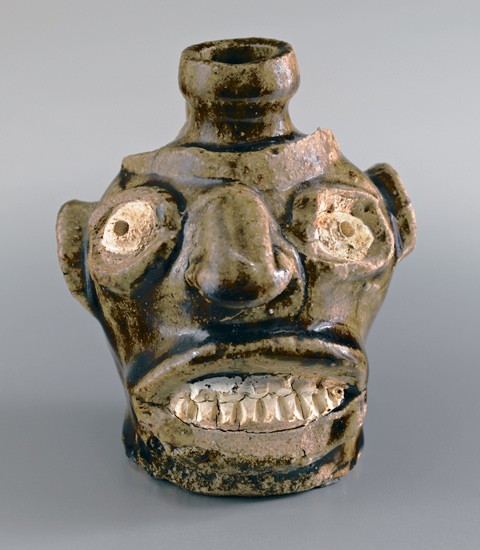
Face jug, Edgefield, South Carolina, ca. 1860–1870. Alkaline-glazed stoneware. H. 4 7/8". (Courtesy, Arthur Goldberg; photo, Gavin Ashworth.)
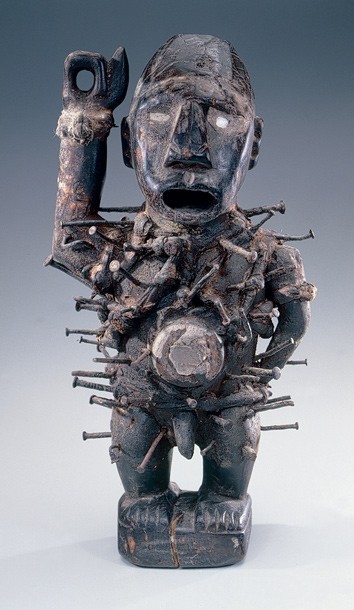
Nkisi figure, Zaire, Africa, ca. 1900. Canarium schweinfurthii. H. 18 7/8". (Courtesy, Georgia Archaeological Institute; photo, Gavin Ashworth.)
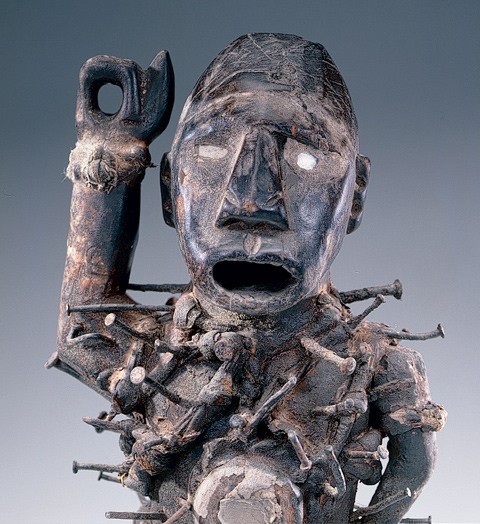
Detail of the nkisi figure illustrated in fig. 6
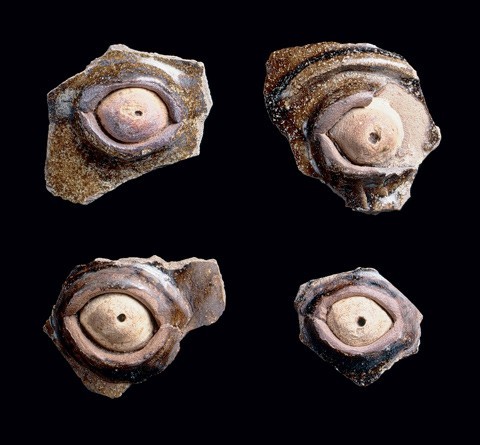
Face jug fragments, Miles Mill, Edgefield, South Carolina, ca. 1867–1872. Alkaline-glazed stoneware.
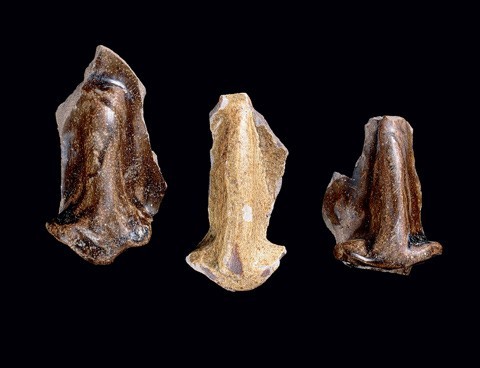
Face jug fragments, Miles Mill, Edgefield, South Carolina, ca. 1867–1872. Alkaline-glazed stoneware.
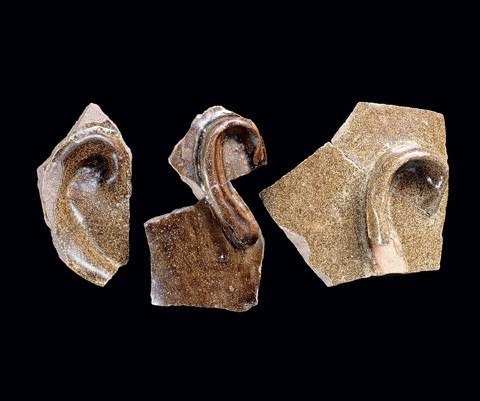
Face jug fragments, Miles Mill, Edgefield, South Carolina, ca. 1867–1872. Alkaline-glazed stoneware.
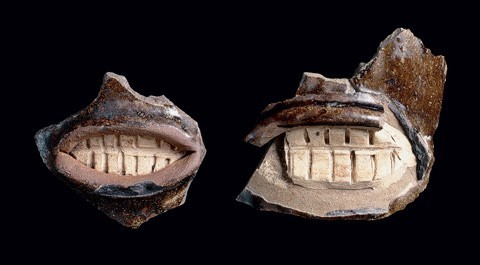
Face jug fragments, Miles Mill, Edgefield, South Carolina, ca. 1867–1872. Alkaline-glazed stoneware.
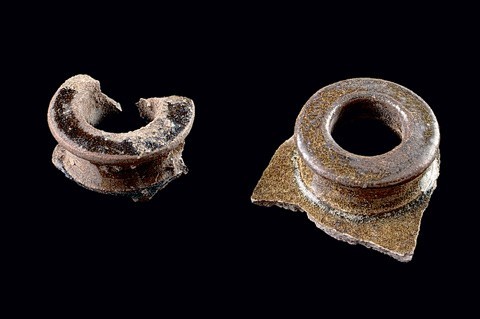
Face jug neck fragments, Miles Mill, Edgefield, South Carolina, ca. 1867–1872. Alkaline-glazed stoneware.
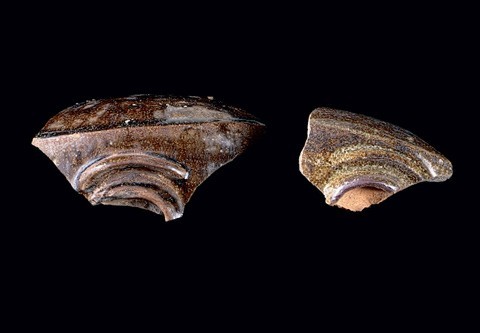
Face jug fragments, Miles Mill, Edgefield, South Carolina, ca. 1867–1872. Alkaline-glazed stoneware.
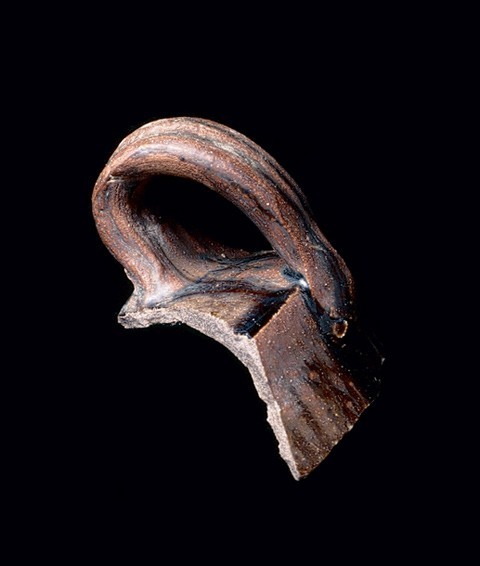
Face jug handle fragment, Miles Mill, Edgefield, South Carolina, ca. 1867–1872. Alkaline-glazed stoneware.
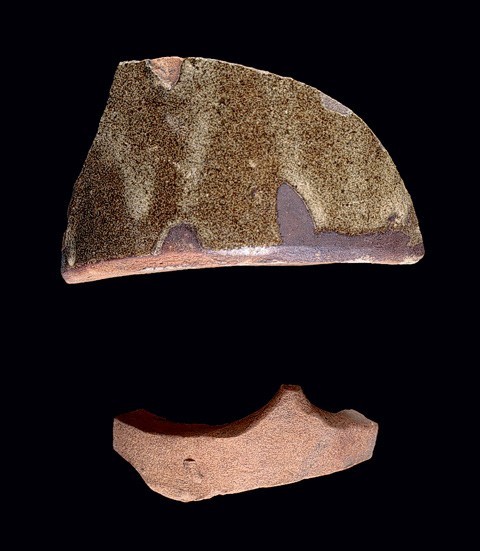
Face jug base fragments, Miles Mill, Edgefield, South Carolina, ca. 1870. Alkaline-glazed stoneware.
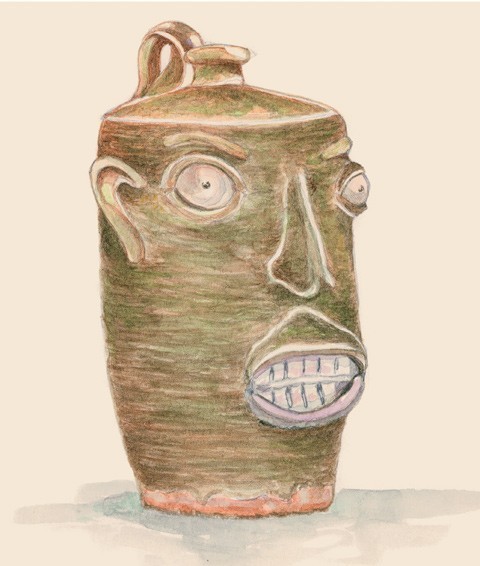
Artist’s reconstruction based on the fragments recovered from the John L. Miles site. (Drawing, Christine Madigan.) The best guess for the shape of the face jug came from an intact storage jug found on the Miles site.
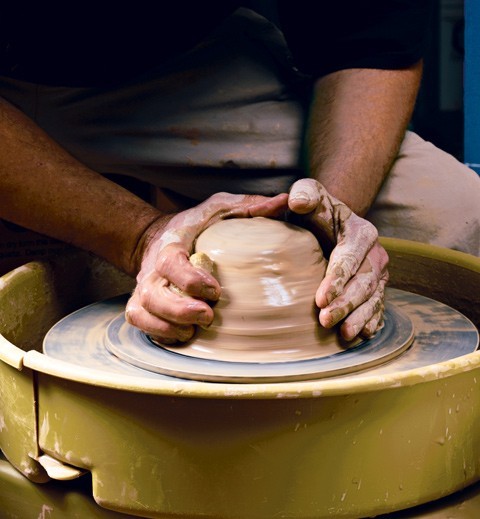
In this sequence of photographs, Peter Lenzo forms the jug on the wheel. First the clay is centered and opened, then a cylinder is raised and the shaping of the body is done. After the body contours are defined, the shoulder and neck are closed to create the jug. The initial finishing of the neck and lip begins at this stage.
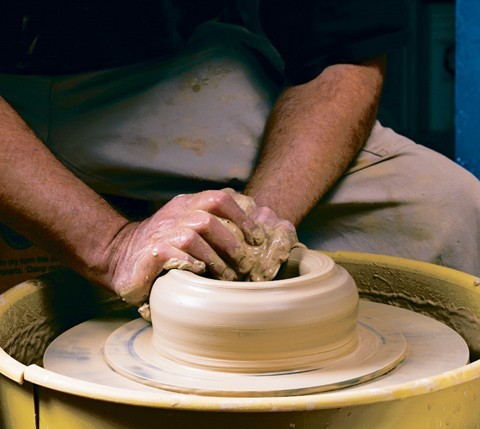
In this sequence of photographs, Peter Lenzo forms the jug on the wheel. First the clay is centered and opened, then a cylinder is raised and the shaping of the body is done. After the body contours are defined, the shoulder and neck are closed to create the jug. The initial finishing of the neck and lip begins at this stage.
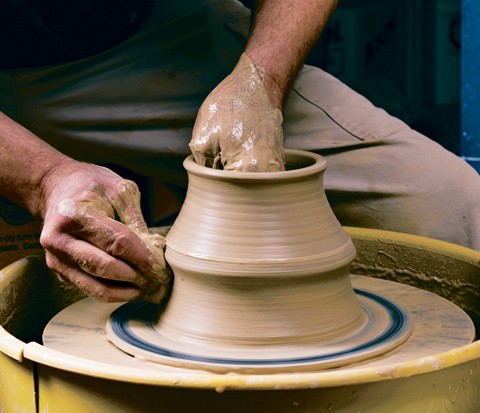
In this sequence of photographs, Peter Lenzo forms the jug on the wheel. First the clay is centered and opened, then a cylinder is raised and the shaping of the body is done. After the body contours are defined, the shoulder and neck are closed to create the jug. The initial finishing of the neck and lip begins at this stage.
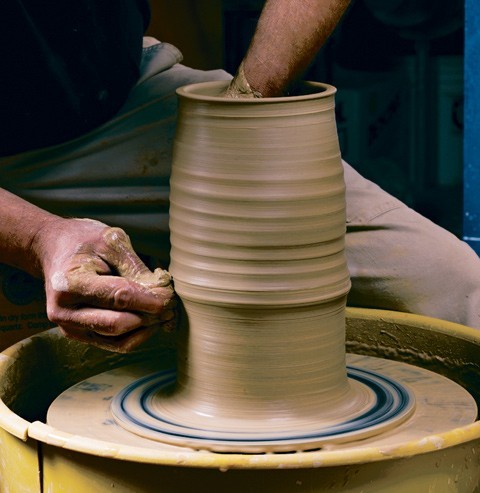
In this sequence of photographs, Peter Lenzo forms the jug on the wheel. First the clay is centered and opened, then a cylinder is raised and the shaping of the body is done. After the body contours are defined, the shoulder and neck are closed to create the jug. The initial finishing of the neck and lip begins at this stage.
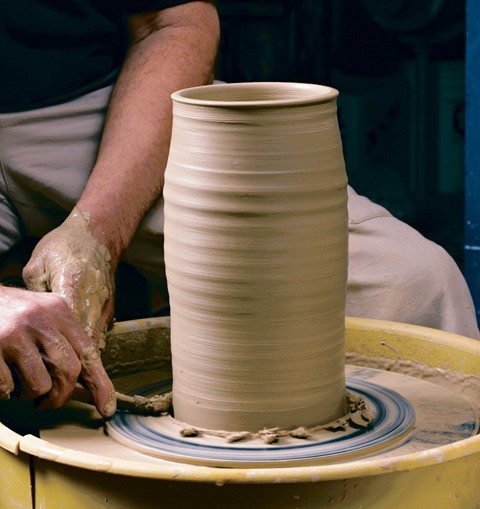
In this sequence of photographs, Peter Lenzo forms the jug on the wheel. First the clay is centered and opened, then a cylinder is raised and the shaping of the body is done. After the body contours are defined, the shoulder and neck are closed to create the jug. The initial finishing of the neck and lip begins at this stage.
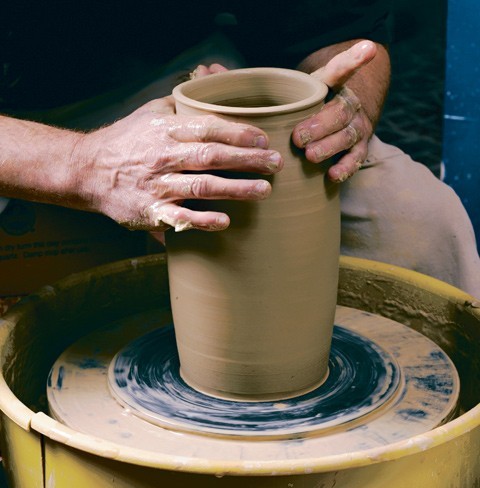
In this sequence of photographs, Peter Lenzo forms the jug on the wheel. First the clay is centered and opened, then a cylinder is raised and the shaping of the body is done. After the body contours are defined, the shoulder and neck are closed to create the jug. The initial finishing of the neck and lip begins at this stage.
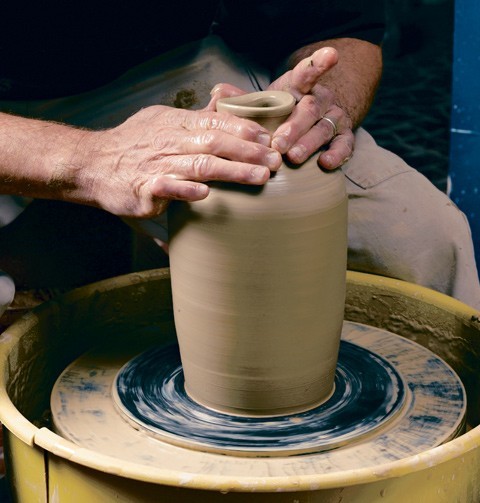
In this sequence of photographs, Peter Lenzo forms the jug on the wheel. First the clay is centered and opened, then a cylinder is raised and the shaping of the body is done. After the body contours are defined, the shoulder and neck are closed to create the jug. The initial finishing of the neck and lip begins at this stage.
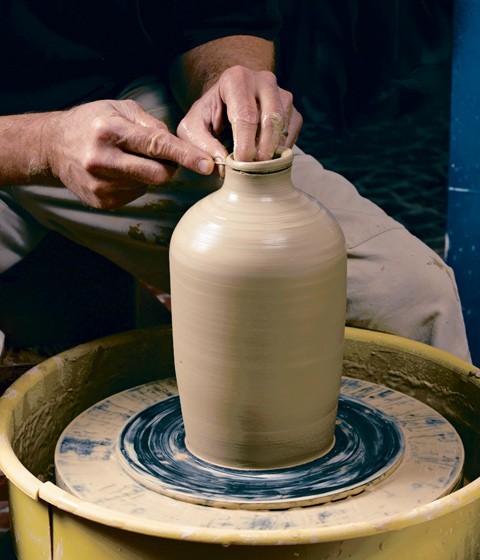
In this sequence of photographs, Peter Lenzo forms the jug on the wheel. First the clay is centered and opened, then a cylinder is raised and the shaping of the body is done. After the body contours are defined, the shoulder and neck are closed to create the jug. The initial finishing of the neck and lip begins at this stage.
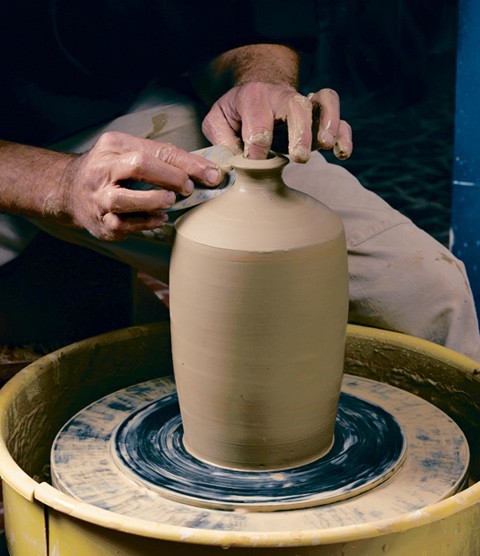
In this sequence of photographs, Peter Lenzo forms the jug on the wheel. First the clay is centered and opened, then a cylinder is raised and the shaping of the body is done. After the body contours are defined, the shoulder and neck are closed to create the jug. The initial finishing of the neck and lip begins at this stage.
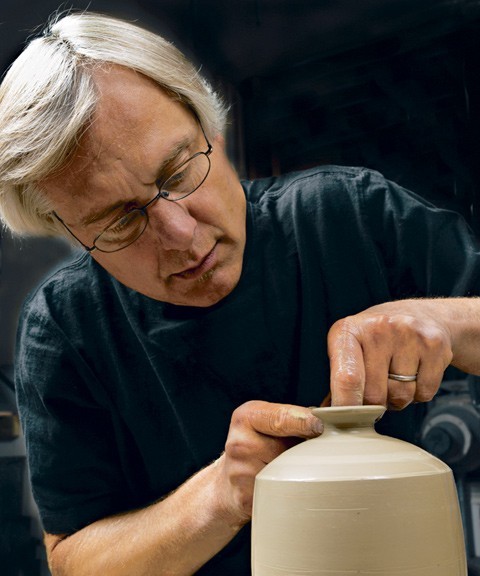
Peter Lenzo finishes the neck and lip of the jug.
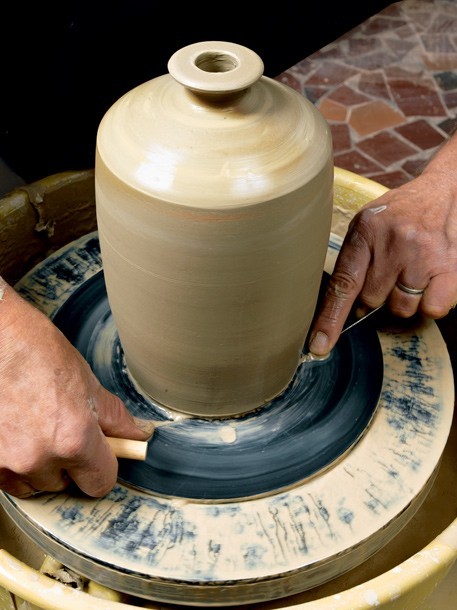
The thrown jug body is cut from the wheel head with a wire tool.
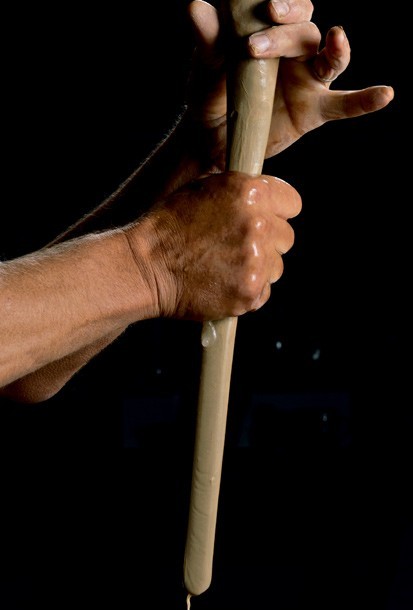
A typical method of forming handles is known as “pulling,” whereby the clay is drawn out in successive pulls until the right thickness is achieved. The pulled strip is then cut to size.
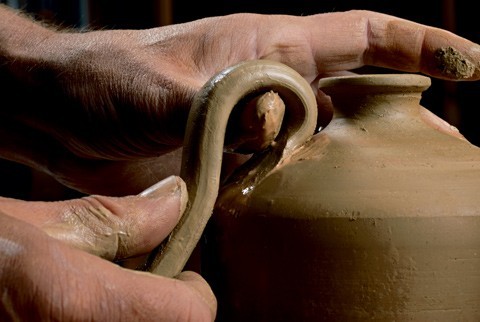
The cut handle is attached first to the shoulder and then to the body.
The first facial feature to be placed is the nose, which is attached as a wedge-shaped coil and subsequently modeled by hand.
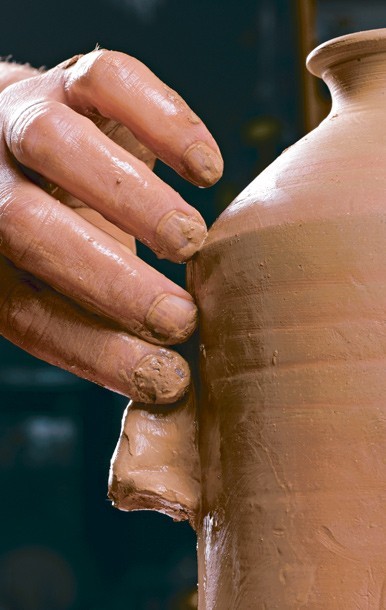
The first facial feature to be placed is the nose, which is attached as a wedge-shaped coil and subsequently modeled by hand.
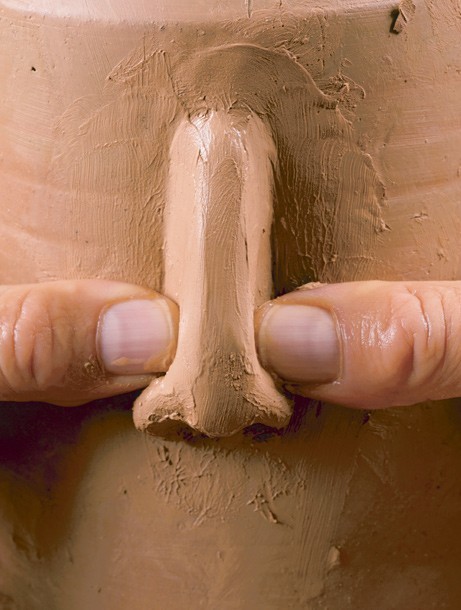
The first facial feature to be placed is the nose, which is attached as a wedge-shaped coil and subsequently modeled by hand.
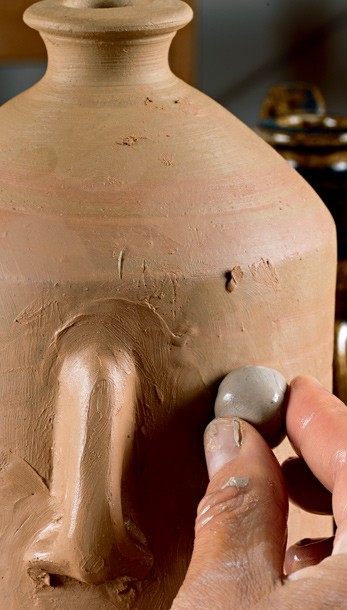
After the nose is formed, two balls of the kaolin that will become the eyes are pressed into position.
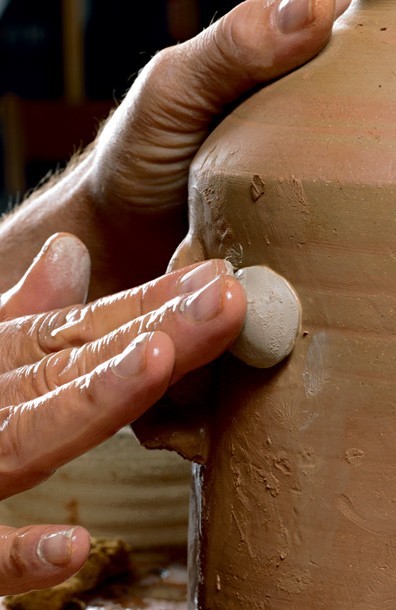
After the nose is formed, two balls of the kaolin that will become the eyes are pressed into position.
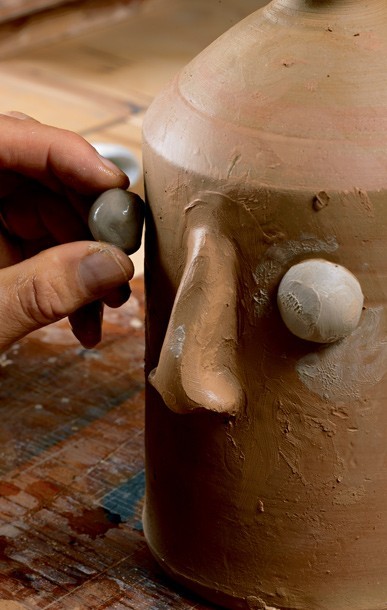
After the nose is formed, two balls of the kaolin that will become the eyes are pressed into position.
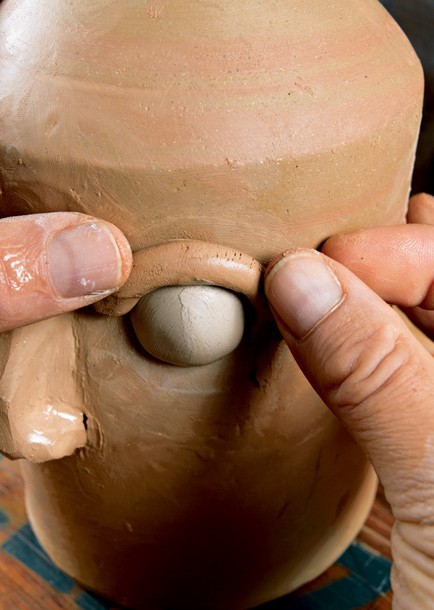
Coils of clay are placed over the top and bottom of the kaolin balls to create the eye sockets. This step is one of the most critical because the shrinkage rate of the two clay bodies differs
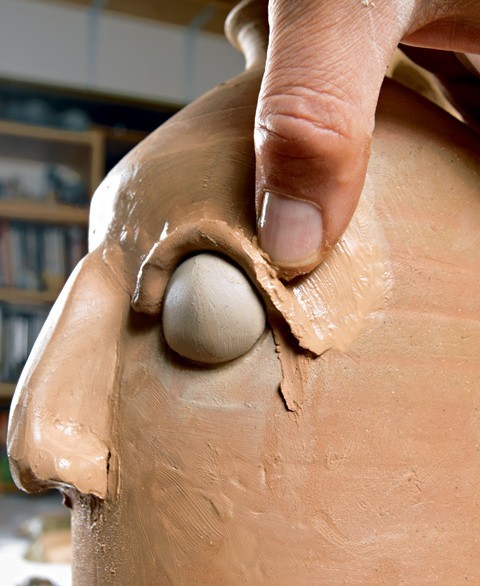
Coils of clay are placed over the top and bottom of the kaolin balls to create the eye sockets. This step is one of the most critical because the shrinkage rate of the two clay bodies differs
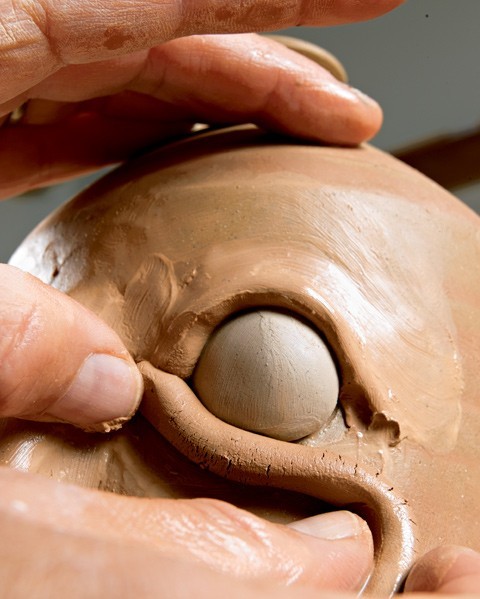
Coils of clay are placed over the top and bottom of the kaolin balls to create the eye sockets. This step is one of the most critical because the shrinkage rate of the two clay bodies differs
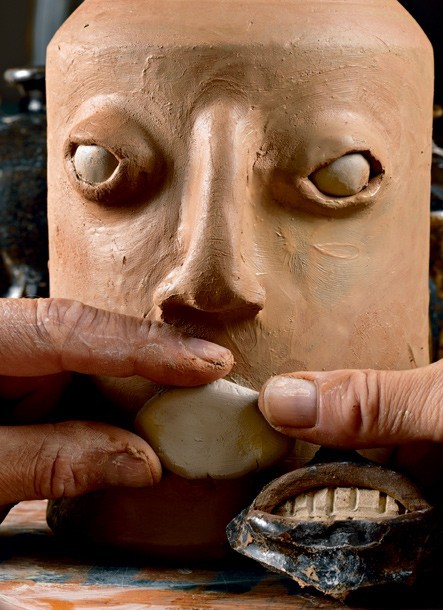
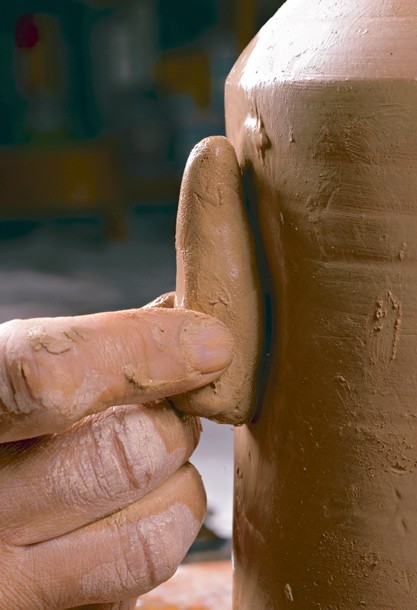
An oval pad of kaolin is prepared and pressed onto the body of the jug. Coils of clay are then placed and modeled to create the lips.
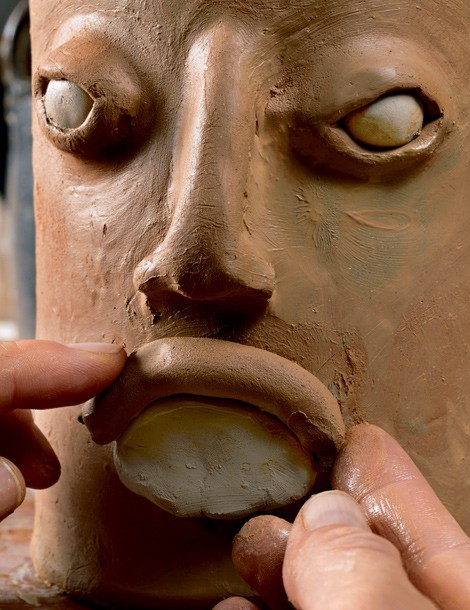
An oval pad of kaolin is prepared and pressed onto the body of the jug. Coils of clay are then placed and modeled to create the lips.
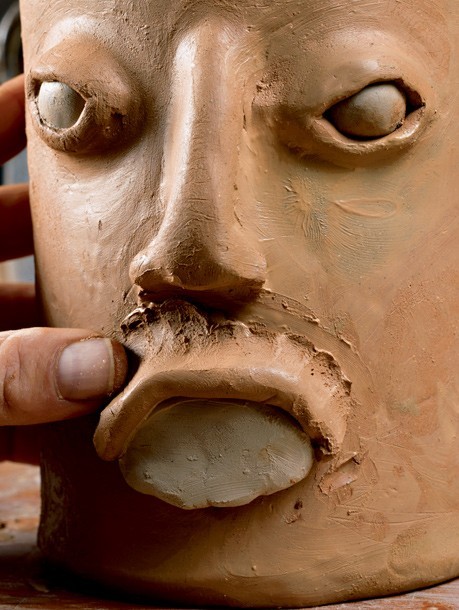
An oval pad of kaolin is prepared and pressed onto the body of the jug. Coils of clay are then placed and modeled to create the lips.
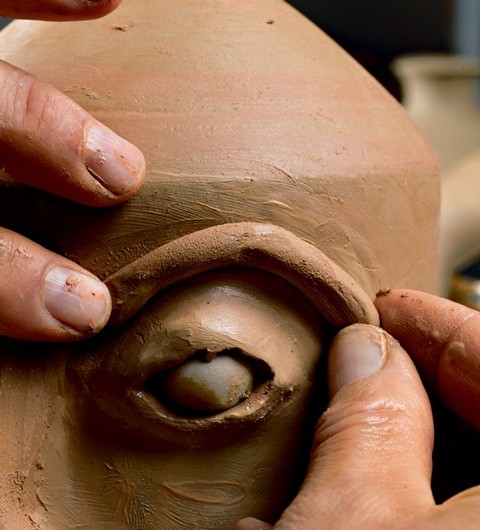
Clay coils are positioned to form the eyebrows, which are modeled with the help of a stick tool.
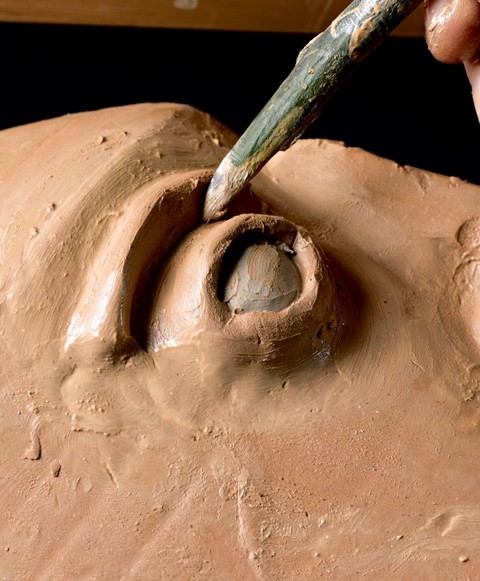
Clay coils are positioned to form the eyebrows, which are modeled with the help of a stick tool.
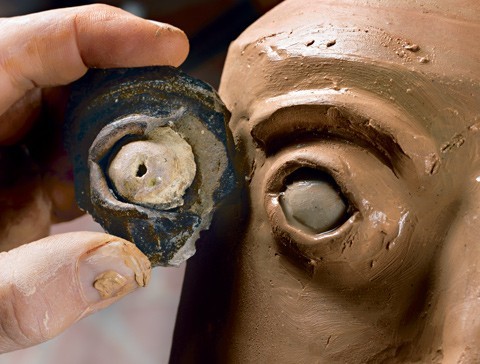
An original eye fragment is compared to Lenzo’s prototype.
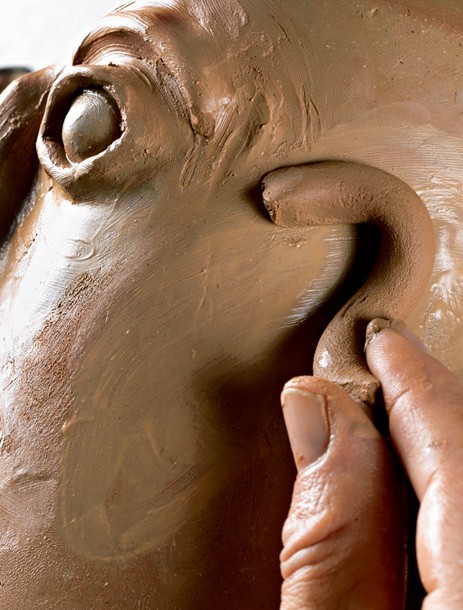
Clay coils are placed for the ears, which are modeled by hand.
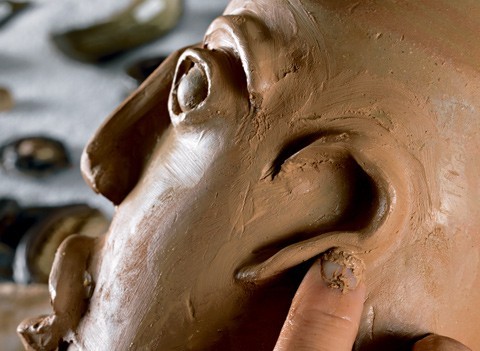
Clay coils are placed for the ears, which are modeled by hand.
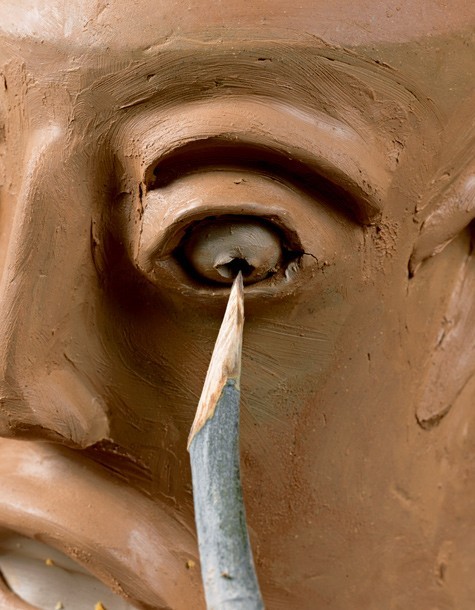
A sharpened stick is used to create the iris. Most of the punctures observed on the fragments were deep and tubular.
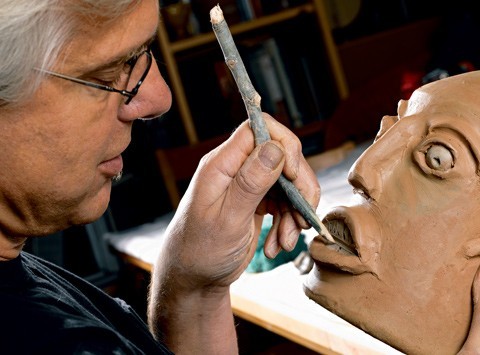
The teeth are etched with a stick. Close examination of the fragments reveals that these marks were made after the lips had been applied.
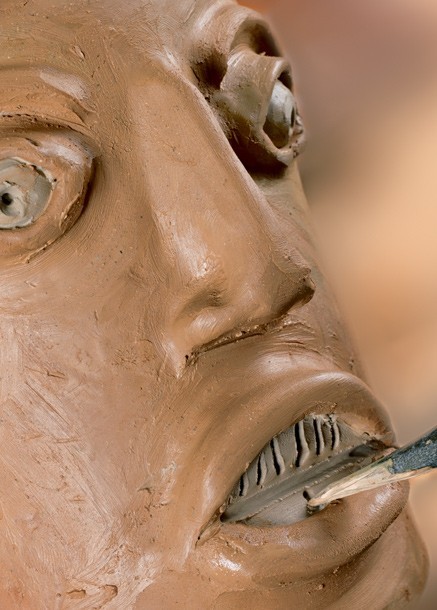
The teeth are etched with a stick. Close examination of the fragments reveals that these marks were made after the lips had been applied.
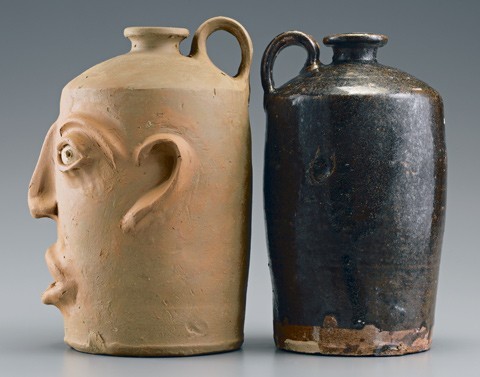
As clay normally shrinks 10 to 15 percent during drying and firing, the unfired prototype face jug appears larger than the intact storage jug recovered from the site.
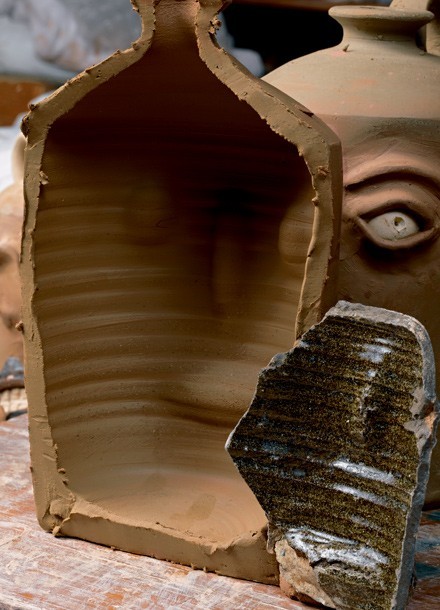
One of the demonstration jugs was cut in half to show the interior depressions resulting from the pressure applied when attaching the various facial features. These depressions are an exact match for many of the original sherds.
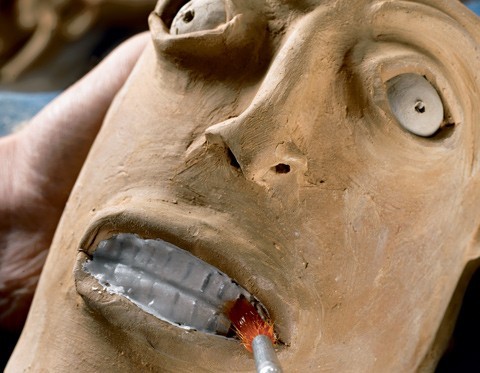
Melted wax is brushed over the kaolin mouth and eyes. This resist, which prevents the glaze from sticking to the kaolin, will burn off during firing leaving the applied areas white and unglazed. Some type of beeswax is thought to have been used by the Edgefield potters.
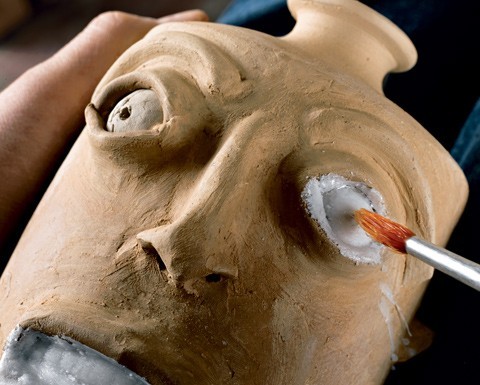
Melted wax is brushed over the kaolin mouth and eyes. This resist, which prevents the glaze from sticking to the kaolin, will burn off during firing leaving the applied areas white and unglazed. Some type of beeswax is thought to have been used by the Edgefield potters.
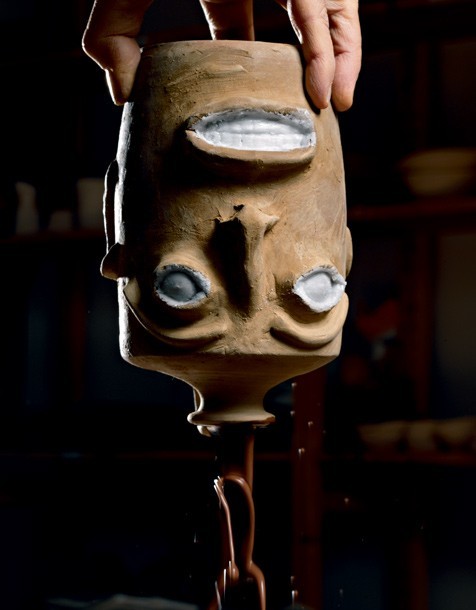
The liquid glaze—a mixture of commercially prepared fine clay, hardwood ash secured from fireplaces and woodstoves, and mined feldspar—is poured into the interior of the jug and allowed to drain. The exterior of the jug is then dipped in the glaze and allowed to air dry. Note how the wax over the eyes and mouth repels the glaze. Many original sherds and vessels exhibit finger marks on the bases of the jugs (see fig. 35). The absence of glaze on the pot’s bottom helps keep them from sticking to the kiln during firing.
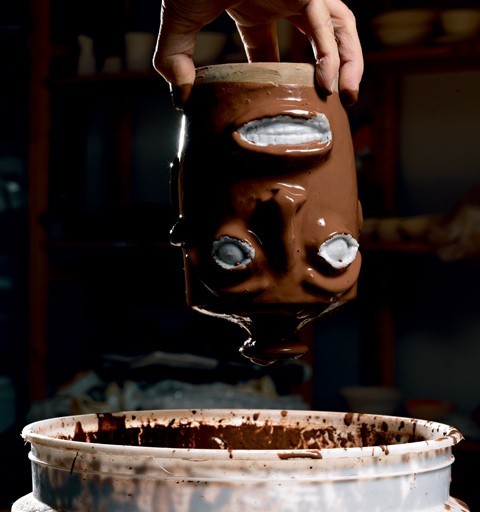
The liquid glaze—a mixture of commercially prepared fine clay, hardwood ash secured from fireplaces and woodstoves, and mined feldspar—is poured into the interior of the jug and allowed to drain. The exterior of the jug is then dipped in the glaze and allowed to air dry. Note how the wax over the eyes and mouth repels the glaze. Many original sherds and vessels exhibit finger marks on the bases of the jugs (see fig. 35). The absence of glaze on the pot’s bottom helps keep them from sticking to the kiln during firing.
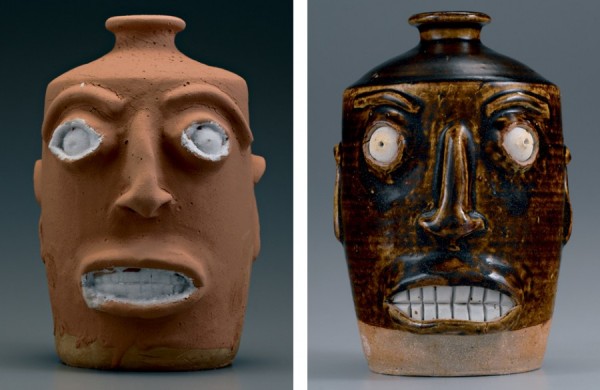
Face jugs, Peter Lenzo, Columbia, South Carolina, 2006. Alkaline-glazed stoneware. H. 9 1/2". At left is the glazed but unfired face jug. At right is a previously fired example of a jug, shown to illustrate the alkaline glaze color.
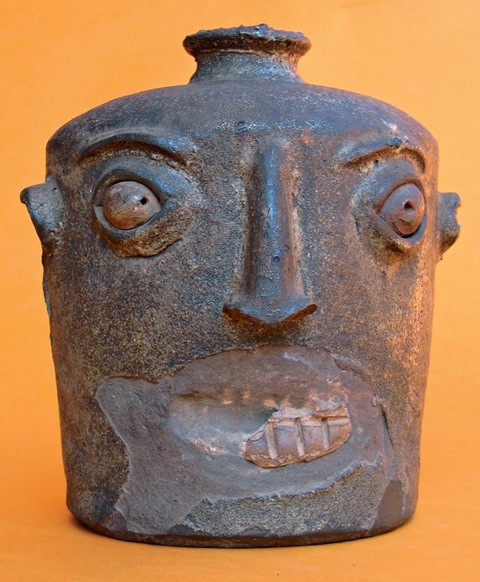
Face jug, Miles Mill, Edgefield, South Carolina, ca. 1867–1872. Alkaline-glazed stoneware. (Courtesy, Charlton Brasher.) Note that the lips and teeth have spalled away on this example at their points of attachment.
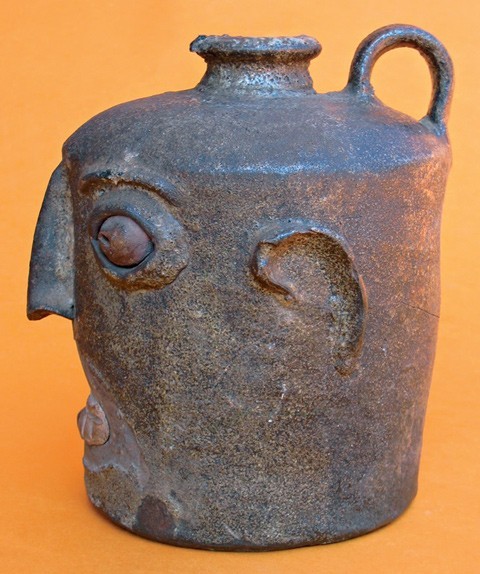
Face jug, Miles Mill, Edgefield, South Carolina, ca. 1867–1872. Alkaline-glazed stoneware. (Courtesy, Charlton Brasher.) Note that the lips and teeth have spalled away on this example at their points of attachment.
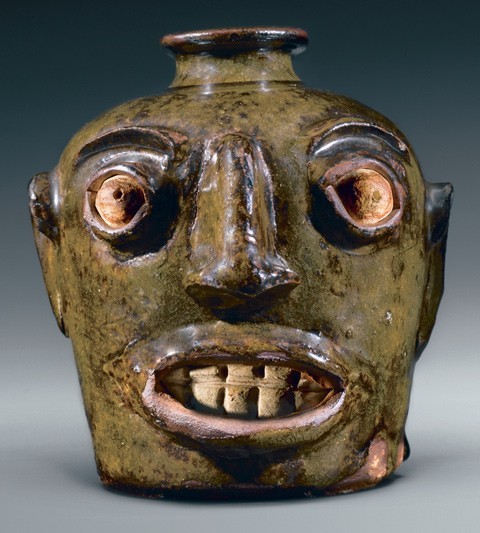
Face jug, Miles Mill, Edgefield, South Carolina, ca. 1867–1872. Alkaline-glazed stoneware. H. 5 9/16". (Private collection; photo, Gavin Ashworth.).
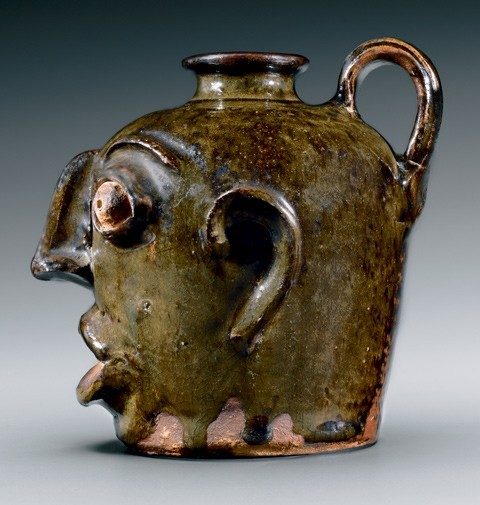
Face jug, Miles Mill, Edgefield, South Carolina, ca. 1867–1872. Alkaline-glazed stoneware. H. 5 9/16". (Private collection; photo, Gavin Ashworth.).
