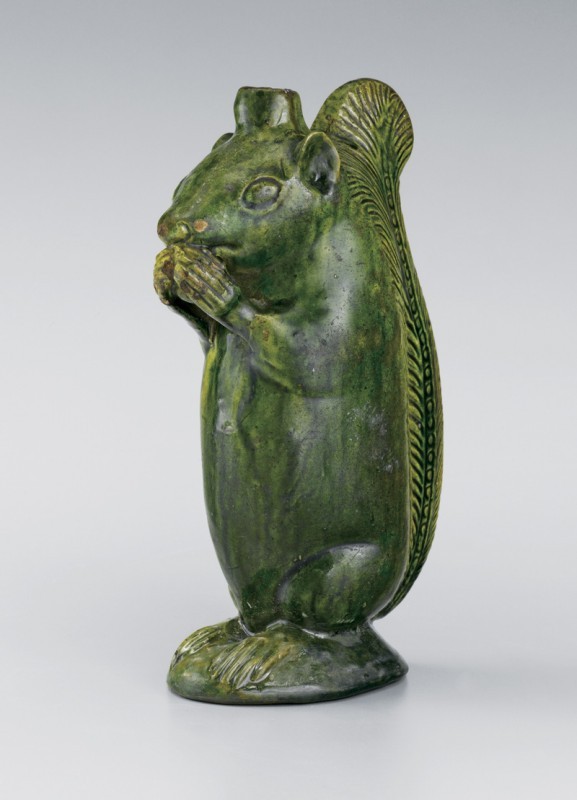
Squirrel bottle, Salem, North Carolina, 1804–1829. Lead-glazed earthenware. H. 8 1/4". (Private collection; unless otherwise noted, photos by Gavin Ashworth.)
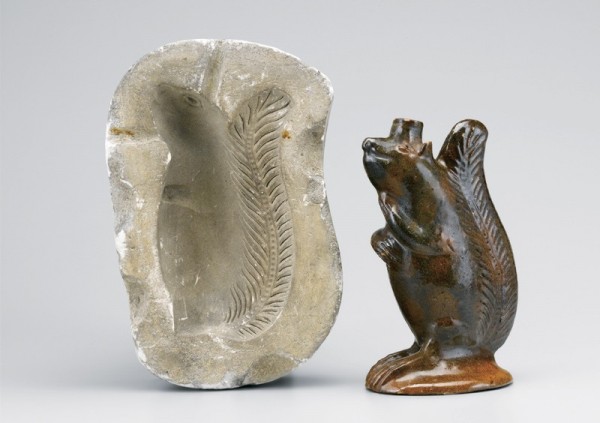
Squirrel bottle and mold, Salem, North Carolina, 1820–1850. Lead-glazed earthenware (bottle) and plaster (mold). H. of bottle 6 1/4". (Courtesy, Old Salem Museums & Gardens.)
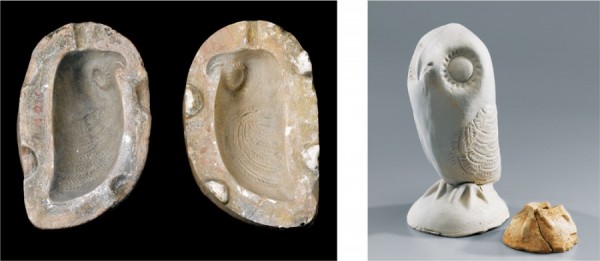
Left: Owl mold, Salem, North Carolina, 1804–1830. Plaster. H. 5 1/2". (Courtesy, Old Salem Museums & Gardens.) Note the narrow opening at the top of the mold through which slip was poured to create the reproduction example. Right: Slip-cast owl figure next to a fragment of a base recovered at the site of the Schaffner-Krause pottery. Unfired slip-cast earthenware and bisque-fired earthenware. H. 6 1/4". (Courtesy, Michelle Erickson [owl figure] and Old Salem Museums & Gardens [fragment].)
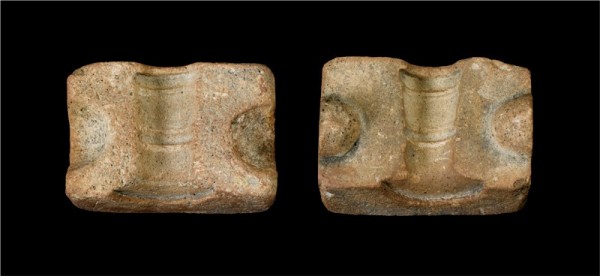
Spout mold, Salem, North Carolina, 1820–1850. Plaster. (Courtesy, Old Salem Museums & Gardens.)
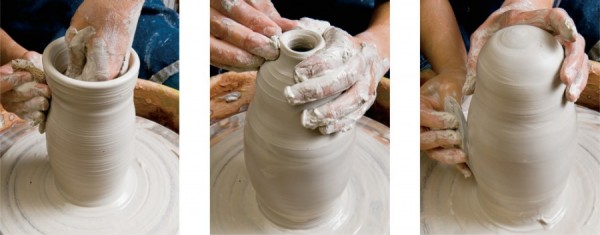
To produce an original model for the squirrel bottle, first a thick cylinder is raised on the wheel. The thickness allows for enough clay to create the sculptural aspects of the squirrel’s body and provides strength for the model during the mold-making process. The top portion of the cylinder is closed and roughly shaped to approximate the body of a squirrel. The trapped air provides the resistance needed in this type of modeling.
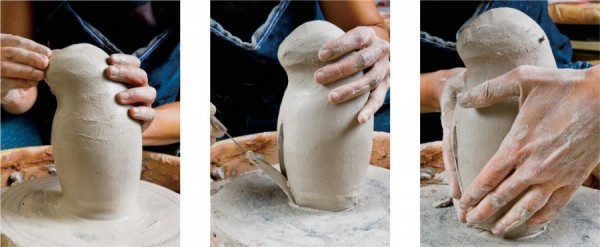
The cylinder is sculpted by hand to outline the figure. A sliver of clay is removed to transform the circular form into an oval.
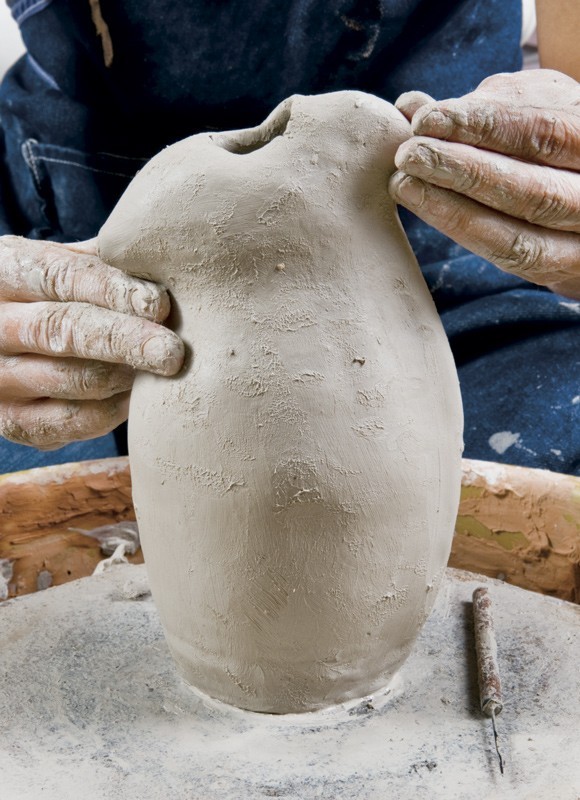
The body features continue to be modeled creating the proportions and character of the original. The roughed-out form is removed from the wheel for the final detailing.
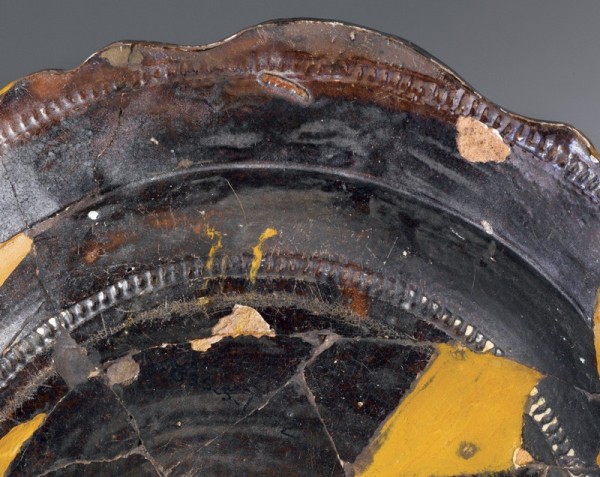
Detail of the back of a molded plate, recovered at the site of Rudolph Christ’s pottery, Bethabara, North Carolina, 1786–1789. Lead-glazed earthenware. D. 9 3/4". (Courtesy, Historic Bethabara Park.)
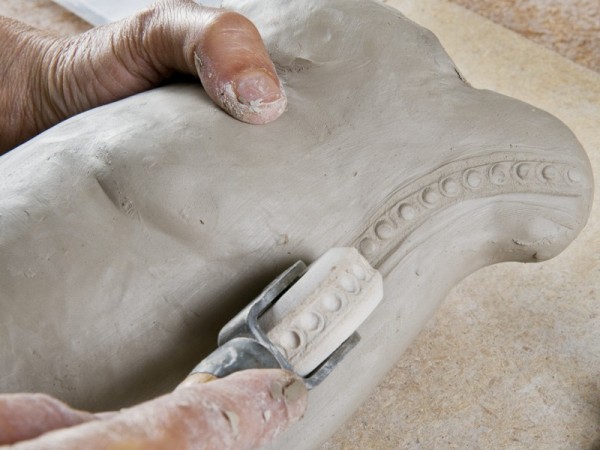
A decorative feature along the tail of the squirrel bottle illustrated in fig. 1 is a rouletted line of beads within incised circles. For this feature, a roulette was carved in plaster and used to create the pattern in the soft clay.
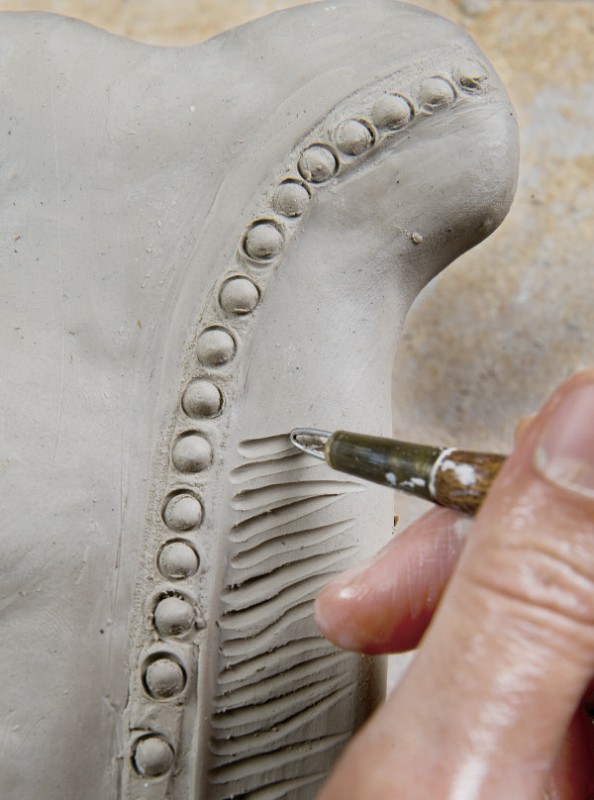
A series of incised lines is used to define the tail.
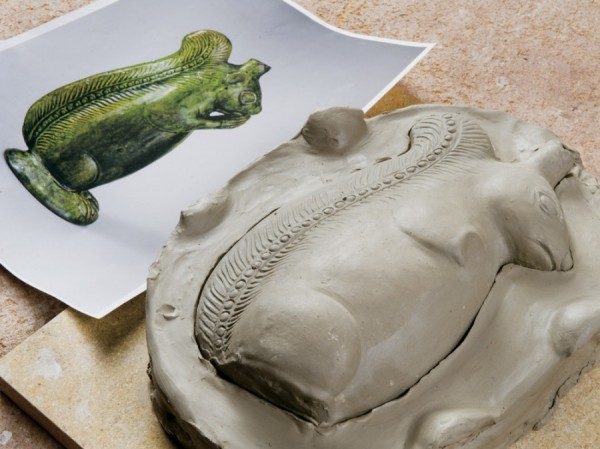
The finished model ready to cast. Note the feet, arms, and ears of the squirrel are not part of the master model. Separate models and molds are required for these appendages as per the originals. A clay slab has been prepared to receive the lower half of the body before casting. Note the triangular registration keys that have been prepared. Such keys can be seen in the Moravian molds.
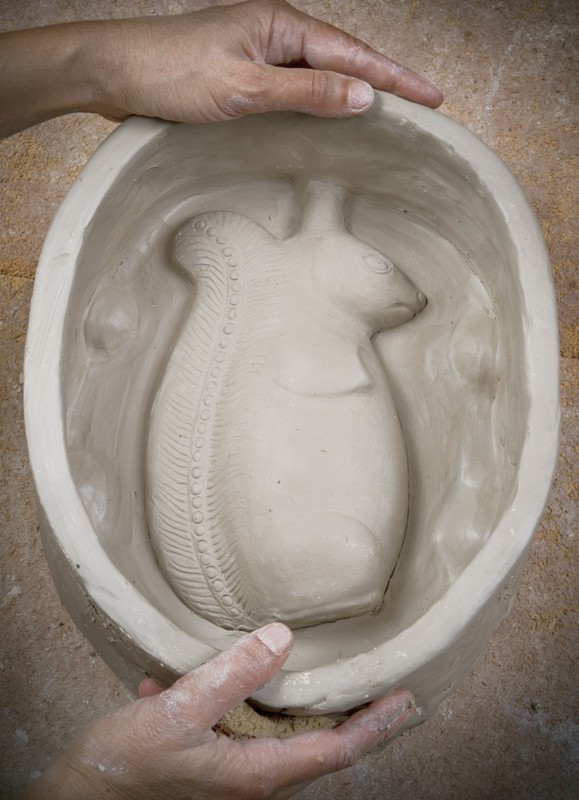
A clay wall is used to seal the interior and act as a retaining wall when the plaster is poured.
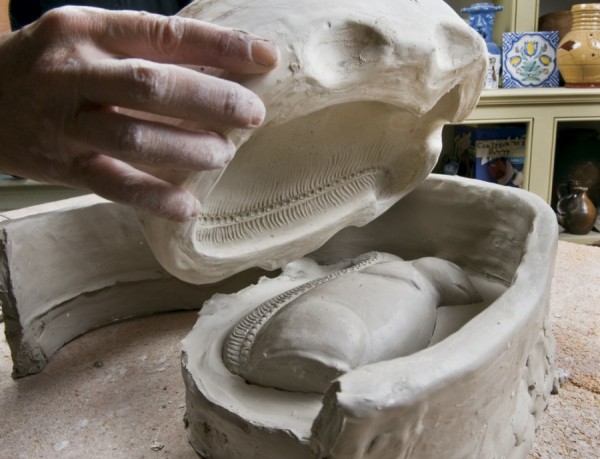
After the plaster has been poured and allowed to cure, the mold is removed. The same procedure is conducted for the opposite half of the model, resulting in a two-piece mold.
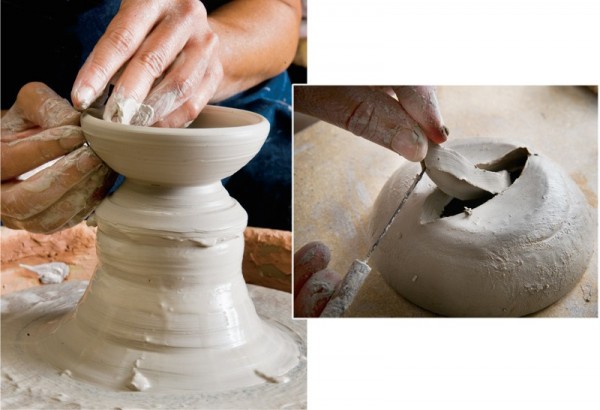
The paws and base require only one-piece molds. The model for the base is thrown as a saucer-shaped form and manipulated to create a rough oval. The details of the feet are modeled into the base and cast. The arms/paws are modeled individually. All of the components are fitted to the model of the body to ensure placement and fit.
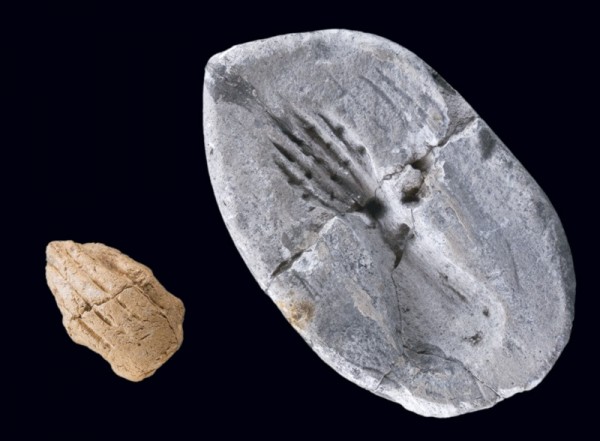
Paw fragment, recovered at the site of the Schaffner-Krause pottery, Salem, North Carolina, post-1834, with a paw mold. Bisque-fired earthenware (paw); plaster (mold). (Courtesy, Old Salem Museums & Gardens [paw], Wachovia Historical Society [mold]; photo, Wesley Stewart.)
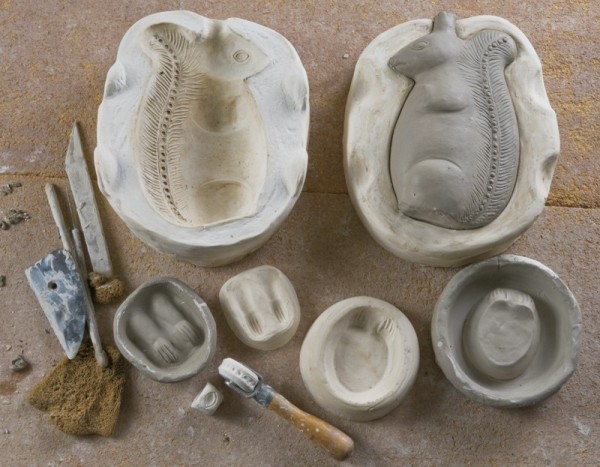
This image shows the components of the modeling and molding process. At the top is the original squirrel-body clay model in the two-piece mold created from it. At the bottom are the master model of the arms and one-piece press mold taken from it, the feet and base master model and one-piece mold, and, next to the roulette wheel, a press mold used to create the eye detail.
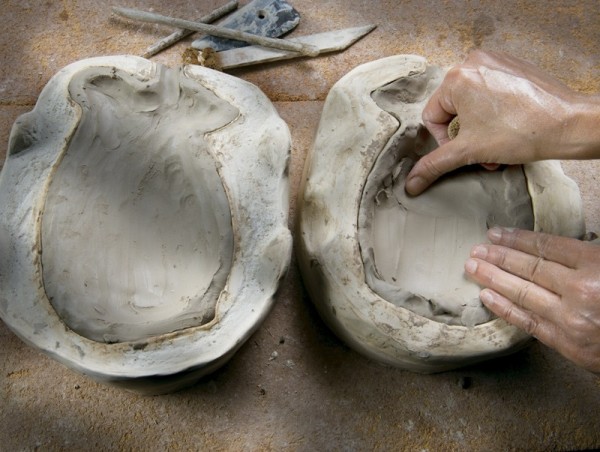
Slabs of clay are prepared and pressed into each half of the plaster mold. Care is taken to press the clay firmly and evenly into the mold to ensure that the details are transferred. It is important to keep the clay in place to avoid overlapping impressions.
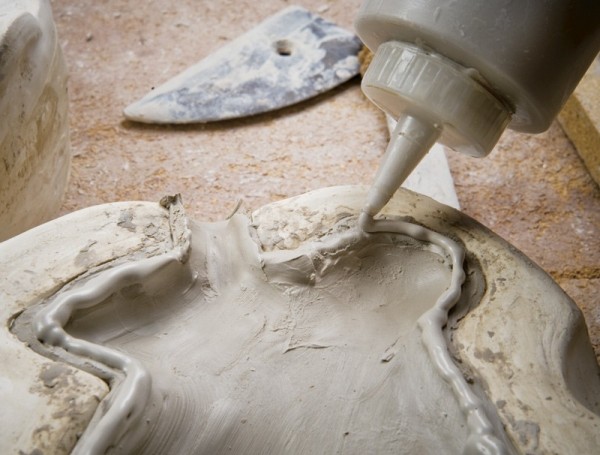
A heavy bead of slip made from the same clay body is applied along the edges of the clay halves.
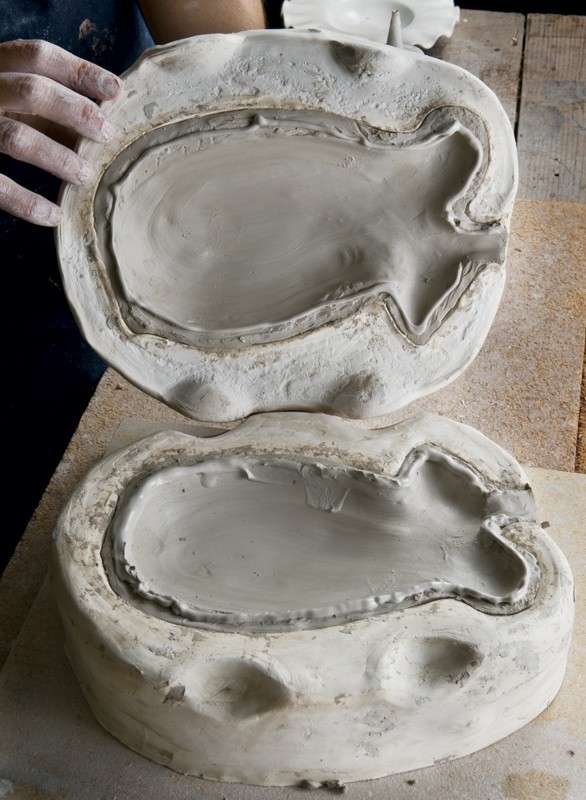
The two halves are pressed together using the keys in the plaster mold to aid proper alignment of the halves.
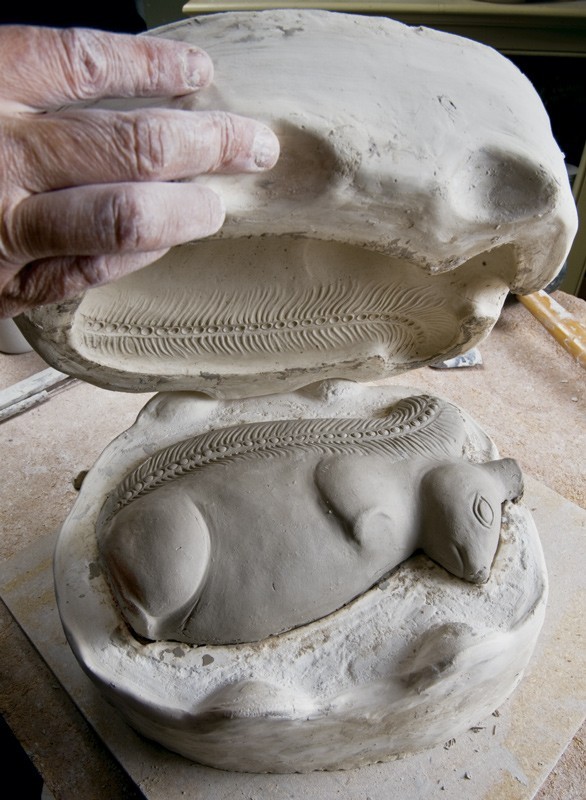
After the two halves are joined, the figure is allowed to dry in the molds to absorb the moisture in the clay. The molds can now be removed, leaving the newly created body. The seams on the body are smoothed and trimmed as necessary.
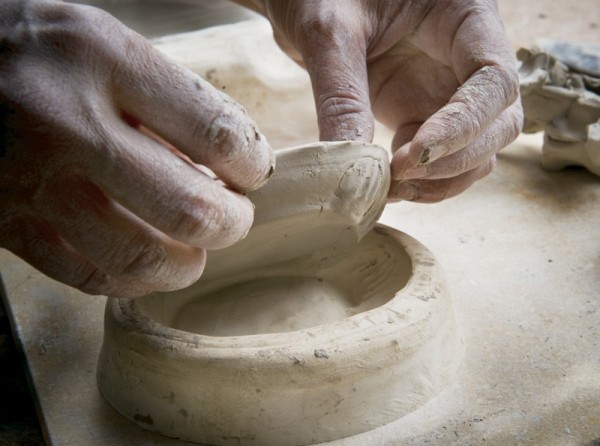
The base is removed from the mold in preparation for assembly. Note the very stylized representation of the squirrel’s feet.
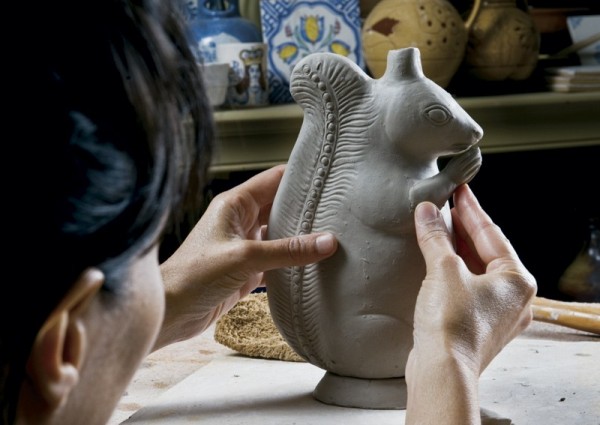
The base and arms are attached to the body using slip and the seams are blended in at the point of attachment.
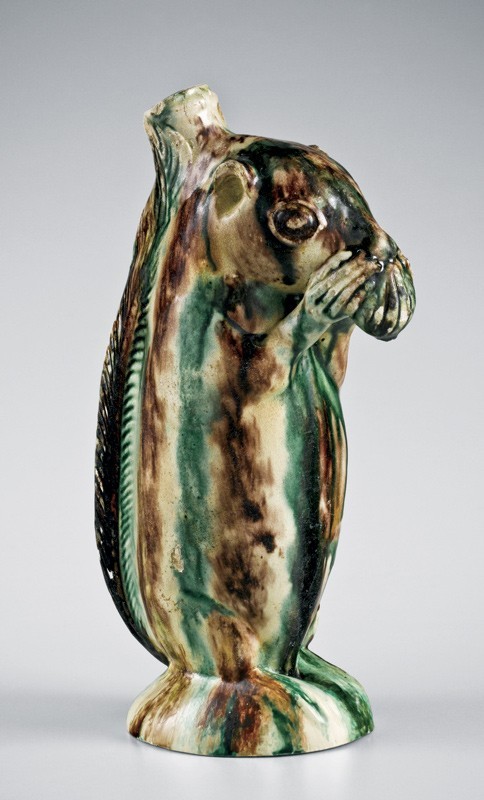
Squirrel bottle, Salem, North Carolina, 1804–1829. Lead-glazed earthenware. H. 8 1/4". (Courtesy, The Metropolitan Museum of Art.)
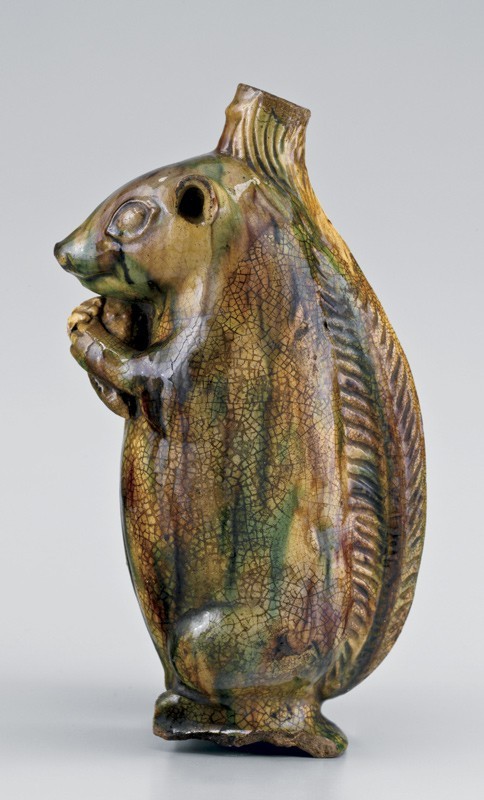
Squirrel bottle, Salem, North Carolina, 1804–1829. Lead-glazed earthenware. H. 8 1/4". (Private collection.)
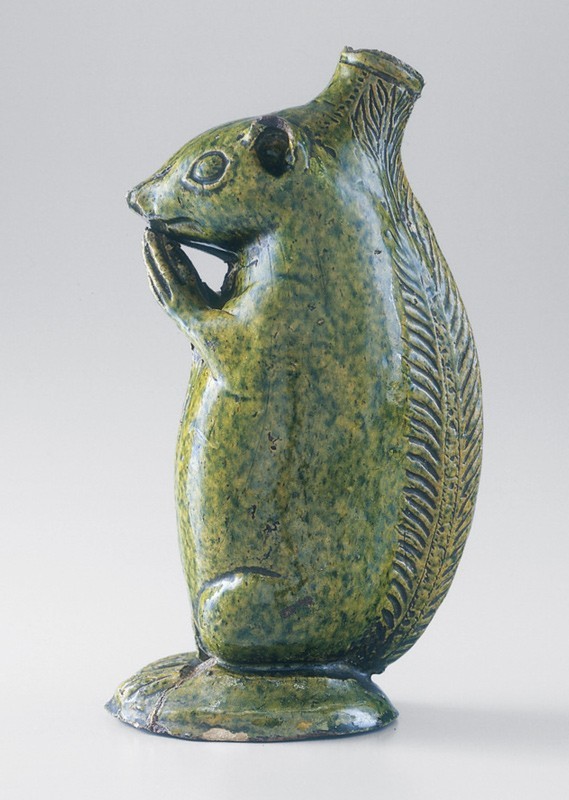
Squirrel bottle, Salem, North Carolina, 1804–1829. Lead-glazed earthenware. H. 8 1/4". (Private collection.)
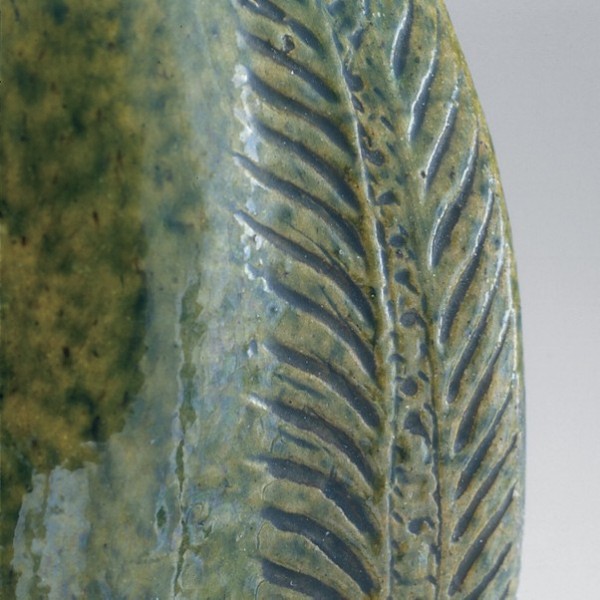
Detail of the squirrel’s tail on the bottle illustrated in fig. 25.
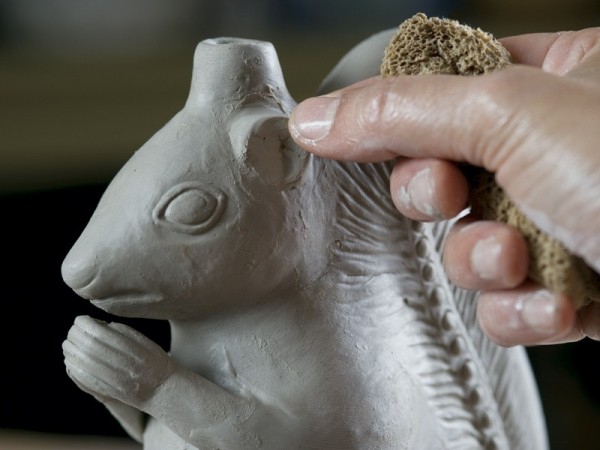
The ears are applied and sculpted by hand, followed by the final finishing of the molded bottle.
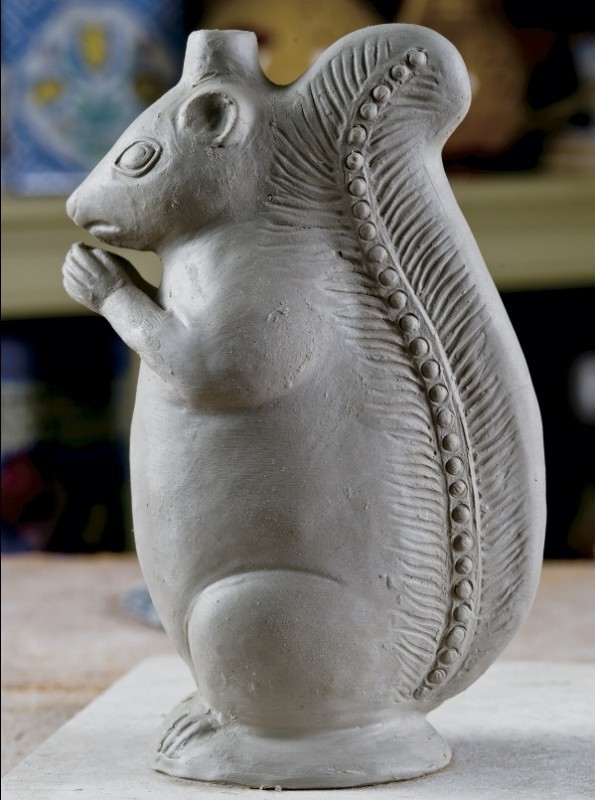
The finished molded squirrel bottle. In this final stage, the bottle is slowly air dried and then bisque fired. The glaze is applied after the first firing. The Moravian glazes include a deep green, a rich dark brown, and a tortoiseshell or Whieldon-type glaze with underglaze oxide colors of green and brown.
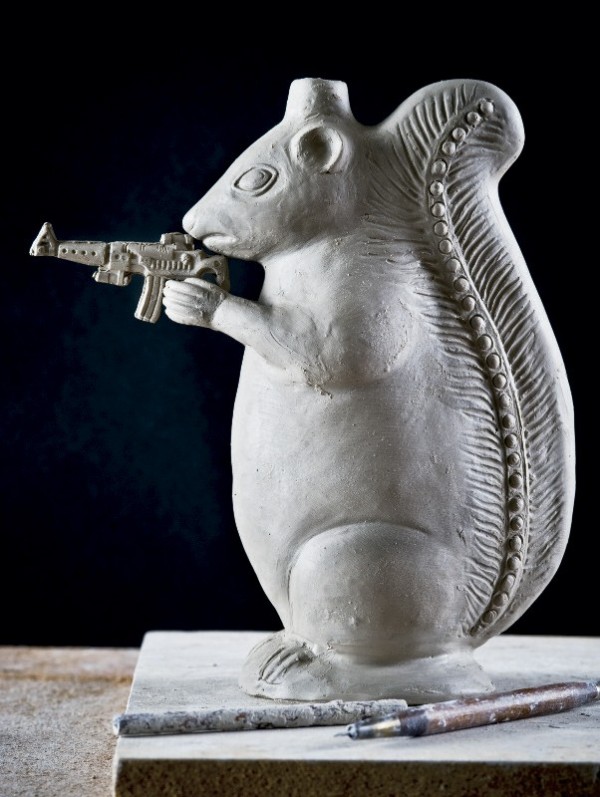
Second Amendment Squirrel, Michelle Erickson, Hampton, Virginia, 2009. Unfired earthenware. H. 9 1/4". (Private collection.)
