


Dish, North Devon, ca. 1670. Slipware. D. 12 1/8". A sgraffito-decorated dish excavated at Jamestown, Virginia. (Collection of Colonial National Park, National Park Service; photo, Gavin Ashworth.) The pattern on this dish is representative of the bold, stylized floral designs found on much of the North Devon sgraffito slipware.
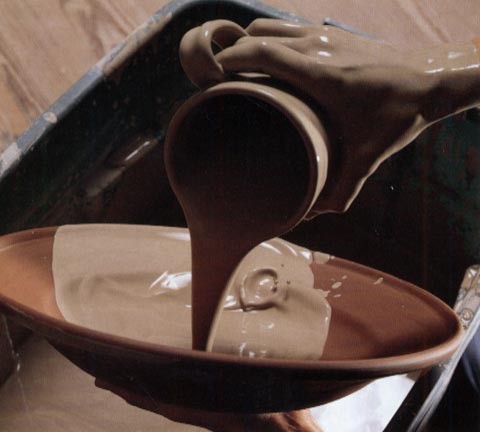
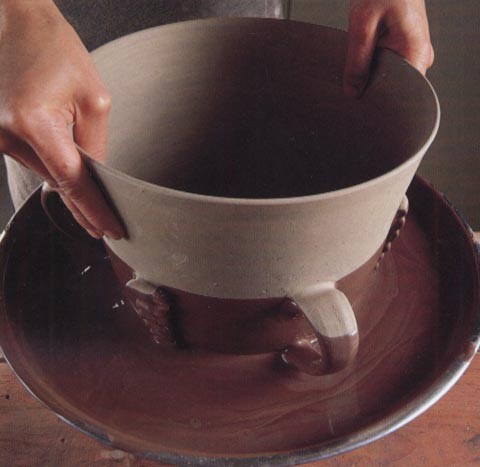
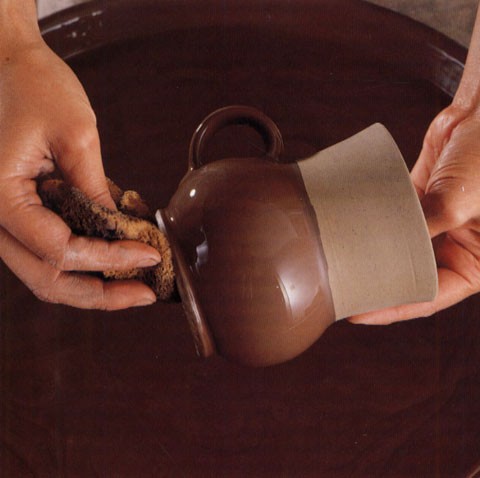
White slip is poured on the upper surface of a wheel-thrown, North Devon–type dish. The dark-bodied charger is at the leather-hard stage. The excess slip is immediately poured off and the charger is set aside to dry. (All demonstration
photography is by Gavin Ashworth.

Coffee pot and lid, Sussex, ca. 1790. Slipware. H. 7". (Courtesy, Chipstone Foundation; photo, Gavin Ashworth.) The design on this coffee pot was scratched or incised into the leather-hard, red clay body. A white slip was applied over the design and scraped or cut away, leaving the filled lines.

Once the slip covering has set up to a leather-hard stage, the sgraffito design is begun. The initial framing of the design is done on the wheel with the layout of concentric circles. The stylus is simply held in a fixed position while the wheel rotates, cutting the lines.

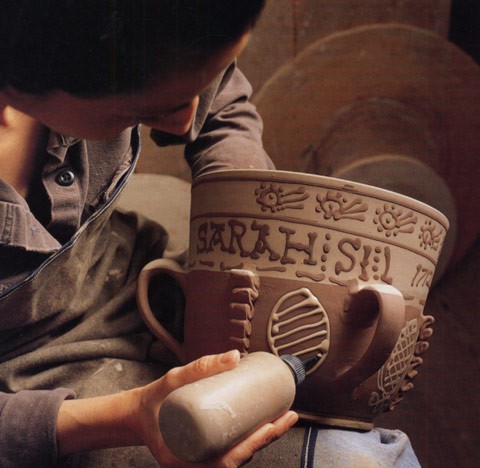
After laying out the initial design, the pattern is incised freehand. The lines are scratched quickly, in a very fluid, gestural movement. Mistakes at this stage are usually not easily corrected. Typical North Devon patterns are floral and geometric designs, although stylized birds and other natural motifs are often seen as well.
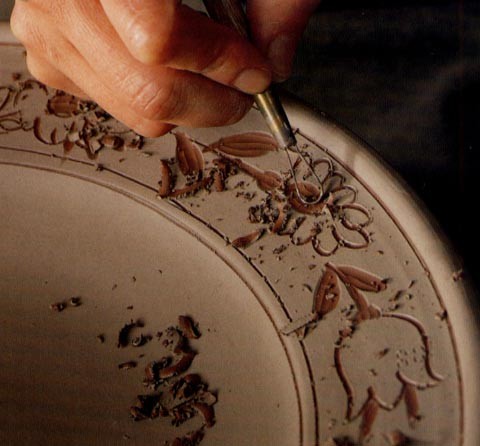
A looped wire tool is used to remove larger areas of slip within the outlined areas.
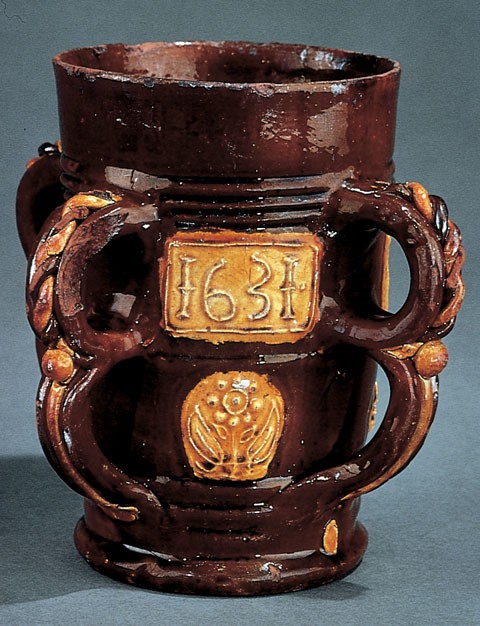
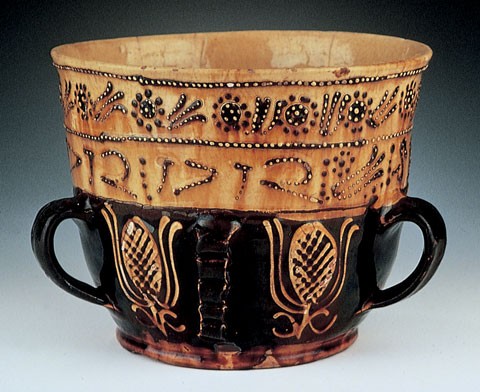
Tyg, Wrotham, 1631. Slipware. H. 7 1/4". (Courtesy, Colonial Williamsburg Foundation.) The ornamentation on this tyg consists of coils and pads of white clay augmented with slip-trailed highlights. The white clay slip is applied directly to a red clay body.
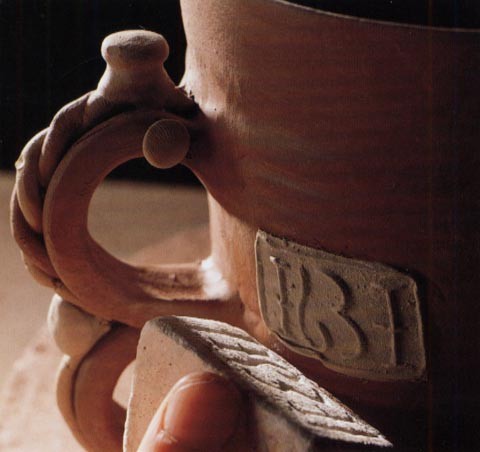
A pad of clay is applied to the leather-hard body and subsequently embossed with a plaster stamp. The clay pad needs to be soft and pliable at this stage in order to get a good impression. The red clay body of the cup, however, has to be fairly firm so that the pressure of the stamping does not deform the shape. Period examples often show evidence of the indentations of the potters’ fingers behind the embossed pads on the inside of the vessel.
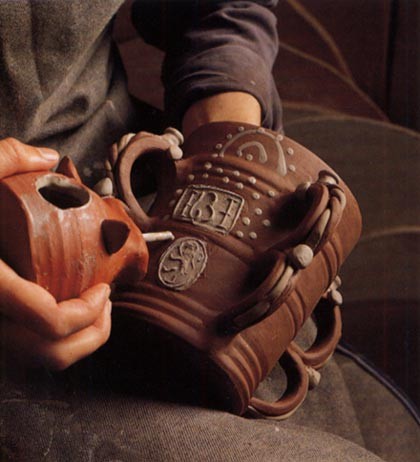
After the clays pads are applied and embossed, white slip is trailed to complete the decoration. Note that strips of white clay have been applied to the handles.
Cup, Staffordshire, 1712. Slipware. H. 7 5/8". (Courtesy, Colonial Williamsburg Foundation.)
The wheel-thrown cup made of white or buff clay has been assembled with handles and the pleated clay flourishes. The bottom half of the cup is dipped in a black slip, the excess is allowed to drip away, and the bottom is wiped clean. The top half of the cup is then dipped into a white slip and both slips are allowed to firm up before decoration is applied.
The initial layout of the design is started by applying concentric lines to the pot on the wheel. Black slip is used on the white ground slip where as a white slip is applied over the black ground slip. The decoration is done freehand and the vessel has to be turned carefully to avoid marring any of the previously applied trailing. A modern slip squeeze bottle is being used.
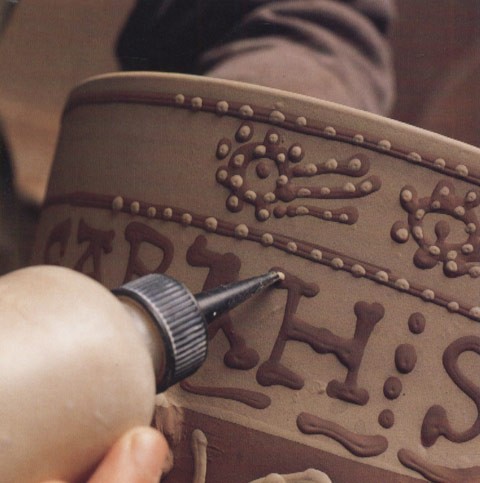
A final embellishment known as “jeweling” is applied. Small dots of white slip are used on top of slip lettering from the previously trailed black slip decoration.
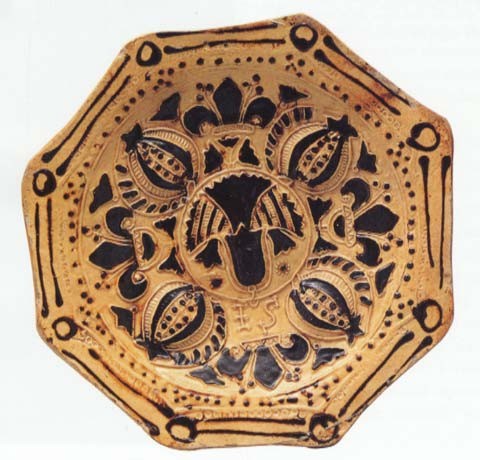
Dish, Staffordshire, probably Burslem, 1700–1725. Slipware. D. 13 1/4". (Courtesy, Chipstone Foundation; photo, Gavin Ashworth.) Slipware press-molded dish with pomegranates and fleurs de lis. A master mold had to be carved to create the relief decoration on these types of dishes.
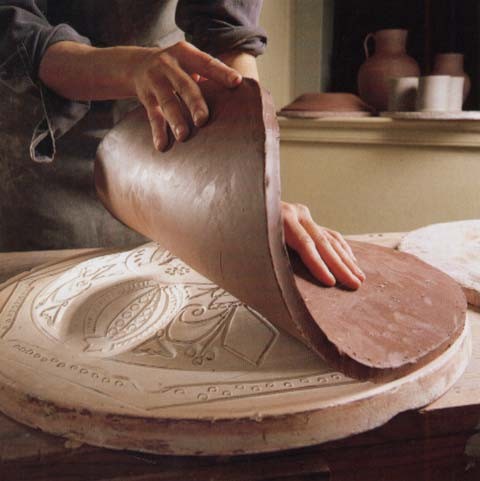
A circular clay slab is draped over a carved plaster mold. The clay is moist and very plastic at this stage. Period molds appear to have been made of fired clay.
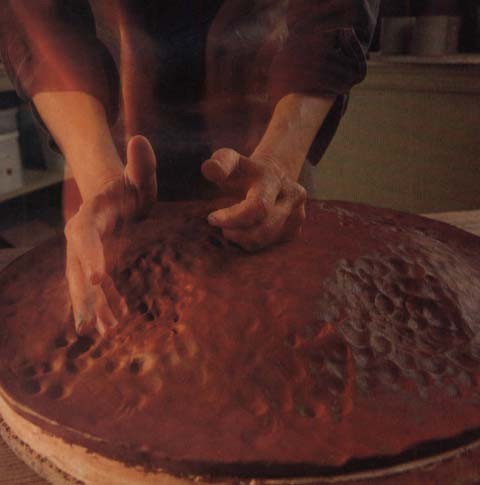
The depth of the carved relief requires that the slab be firmly pressed into the recesses. Slapping or pummeling the slab with a closed fist accomplishes this. After the dish firms up, it is removed and the edges are trimmed.
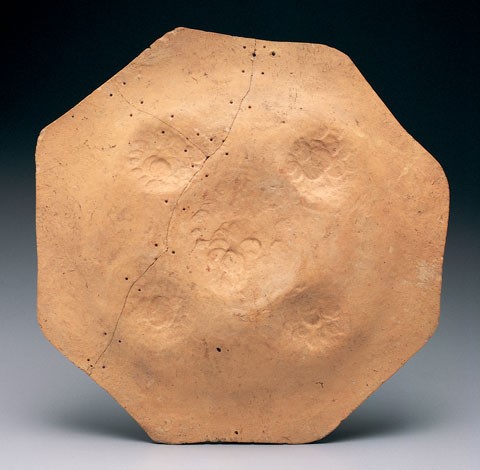
The reverse of the original pomegranate dish illustrated in fig. 14, showing the indentation caused by pressing the clay slab into the deep recesses of the mold. Note that the back of this dish has been neither slipped nor glazed.
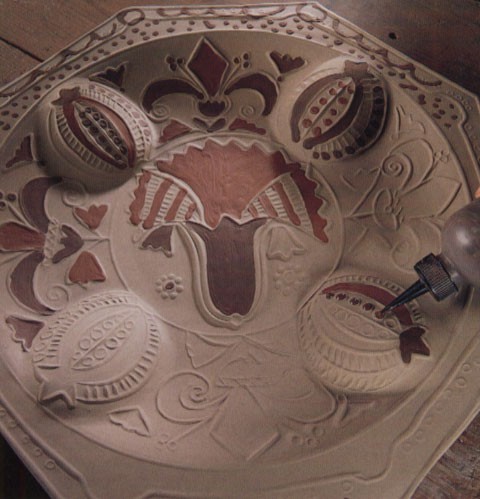
After the slab dries to a leather-hard state, a white ground slip is poured over the interior surface only. Subsequent highlighting of the designs is done with red and black slips using a trailer.
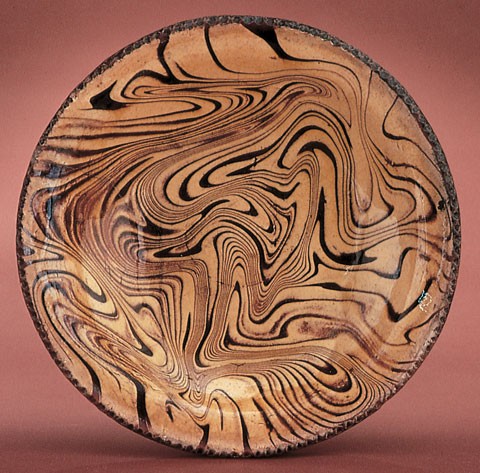
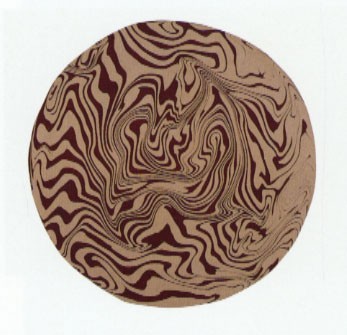
Dish, Staffordshire or Midlands, 1720–1750. Slipware. D. 13 3/4". (Courtesy, Colonial Williamsburg Foundation.) This press-molded, marbled-slip dish is among the most competent examples of this decorating technique.

Creating a marbled-slip dish begins with a black ground slip poured over a flat, circular, red earthen clay slab, previously prepared and supported by a wooden bat. Slabs were prepared by rolling out the clay to an equal thickness.
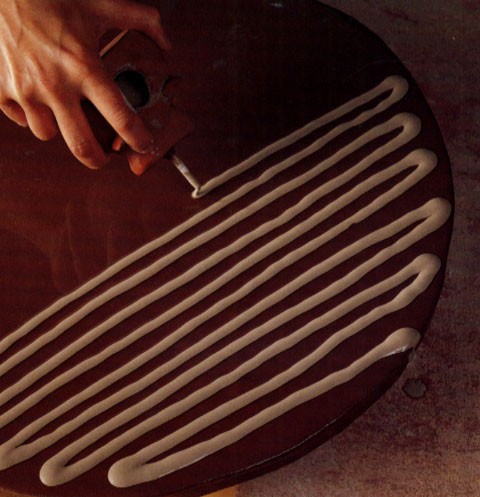
Parallel lines of white slip are immediately trailed onto the wet ground slip. The consistency and moisture content of the slips must allow both to flow easily without running. The width of the lines is dictated by the distance of the tip of the slip tube from the surface of the ground slip: the further from the surface, the wider the line.

The prepared slab immediately before joggling. Note how the white slip lines have overlapped the edge of the slab.

Detail of the marbled dish illustrated in fig. 19. This detail shows the white slip lines, which have overlapped the edge in the making.
The beginning of the marbleization process. The slab, resting on the bat, has been rotated or “joggled” to start the flow of the slips.
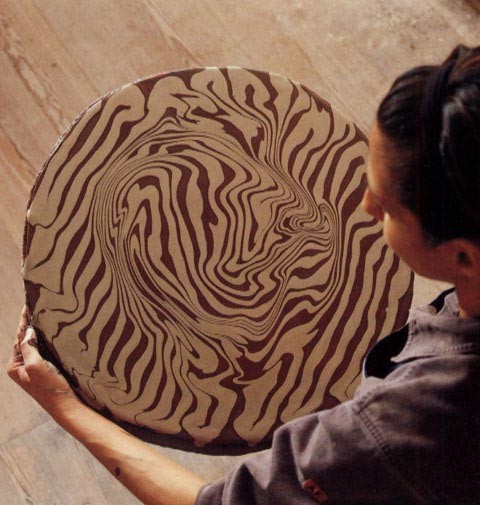
The marbleized slab in the process of joggling. Because both slips tend to dry fairly quickly, the potter must have good control over the process and the decision to stop is an important aesthetic, as well as practical, concern. Elapsed time for joggling is usually no more than a minute or two.
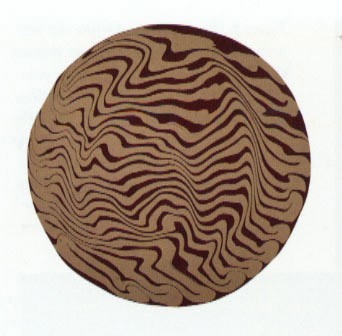
The marbleization process is complete. Note that the decoration is still on a flat slab. Before the vessel is formed, the slips must be allowed to set up to prevent marring of the marbleized surface, yet the slab and the newly slipped surface must remain pliable. If the slab becomes too dry, it will crack. If the slips are still too wet, they will stick to the surface of the mold.

After sufficient drying, the slab is draped over a hump mold and pressed into place to form the dish. These molds were typically made of fired clay, although a plaster one is being shown here. The dish is now allowed to dry further, to a leather-hard stage. The irregular edge is trimmed with a knife to form a completely circular form and the rim is then crimped or coggled. This molding process helps flatten the slips. After glazing, the surface is smooth.
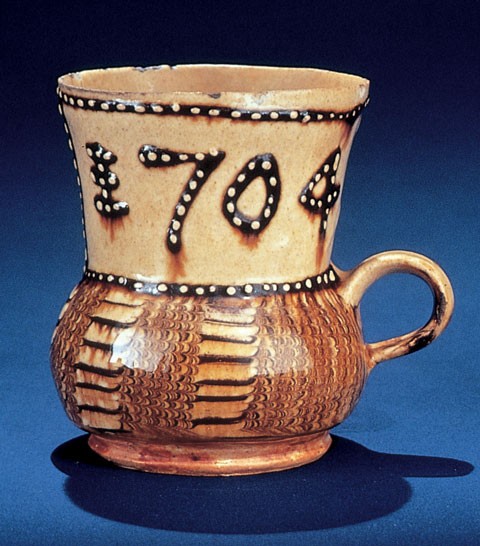
Cup, Staffordshire, dated 1704. Slipware. H. 4 1/2". (Courtesy, Colonial Williamsburg Foundation.) An early example of a fine-grained, combed slipware cup. Trailing and jeweling have been used on the upper portion of the cup.
The lower half of a thrown mug of buff-colored earthenware is dipped into a black slip. The black slip is immediately sponged off the bottom of the mug.
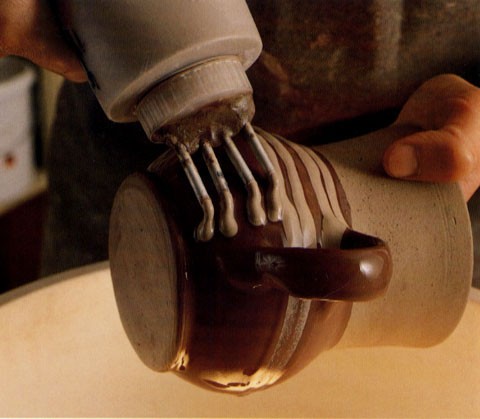
Using a multinozzled slip trailer, white parallel lines are applied over the wet, black slip. Experimentation has suggested that the mug was supported horizontally, perhaps on a lathe or similar device, to facilitate the application of the slip.
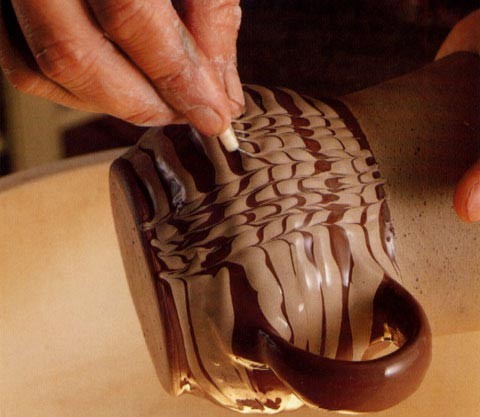
A comb, fashioned with bristles or filament, is drawn through the wet slips to create the feathered effect. The bristles drag the overlying white slip through underlying black slip.
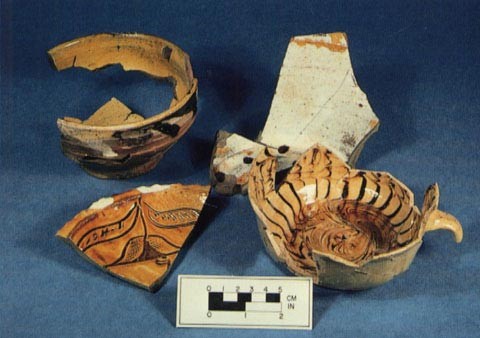
English slipware sherds from a late-seventeenth-/early-eighteenth-century archaeological context; Hampton, Virginia. Examples of North Devon sgraffito and Staffordshire combed and marbled wares. (City of Hampton Collection; photo, Robert Hunter.)